Consular appointment
The Ministry of Foreign Affairs (SRE) updated its appointment platform. The new system, called Citas SRE, is available at https://citas.sre.gob.mx/.
The new system changed both the login and the scheduling process. You can now log in with Llave MX (Mexican nationals) or with your email address (foreign nationals or people without a CURP), and you can even schedule via WhatsApp.
The appointment request is a 5-step wizard: Location, Type of procedure, Applicant information, Documents, and Date and time. Below we explain the entire process, step by step and with screenshots.
In each image, the red arrows and numbers show you exactly where to click.
How to create an account on https://citas.sre.gob.mx, step by step
To schedule an appointment, you first need an account. If you already have one, you can skip to the next section. If not, follow these two steps to sign up.
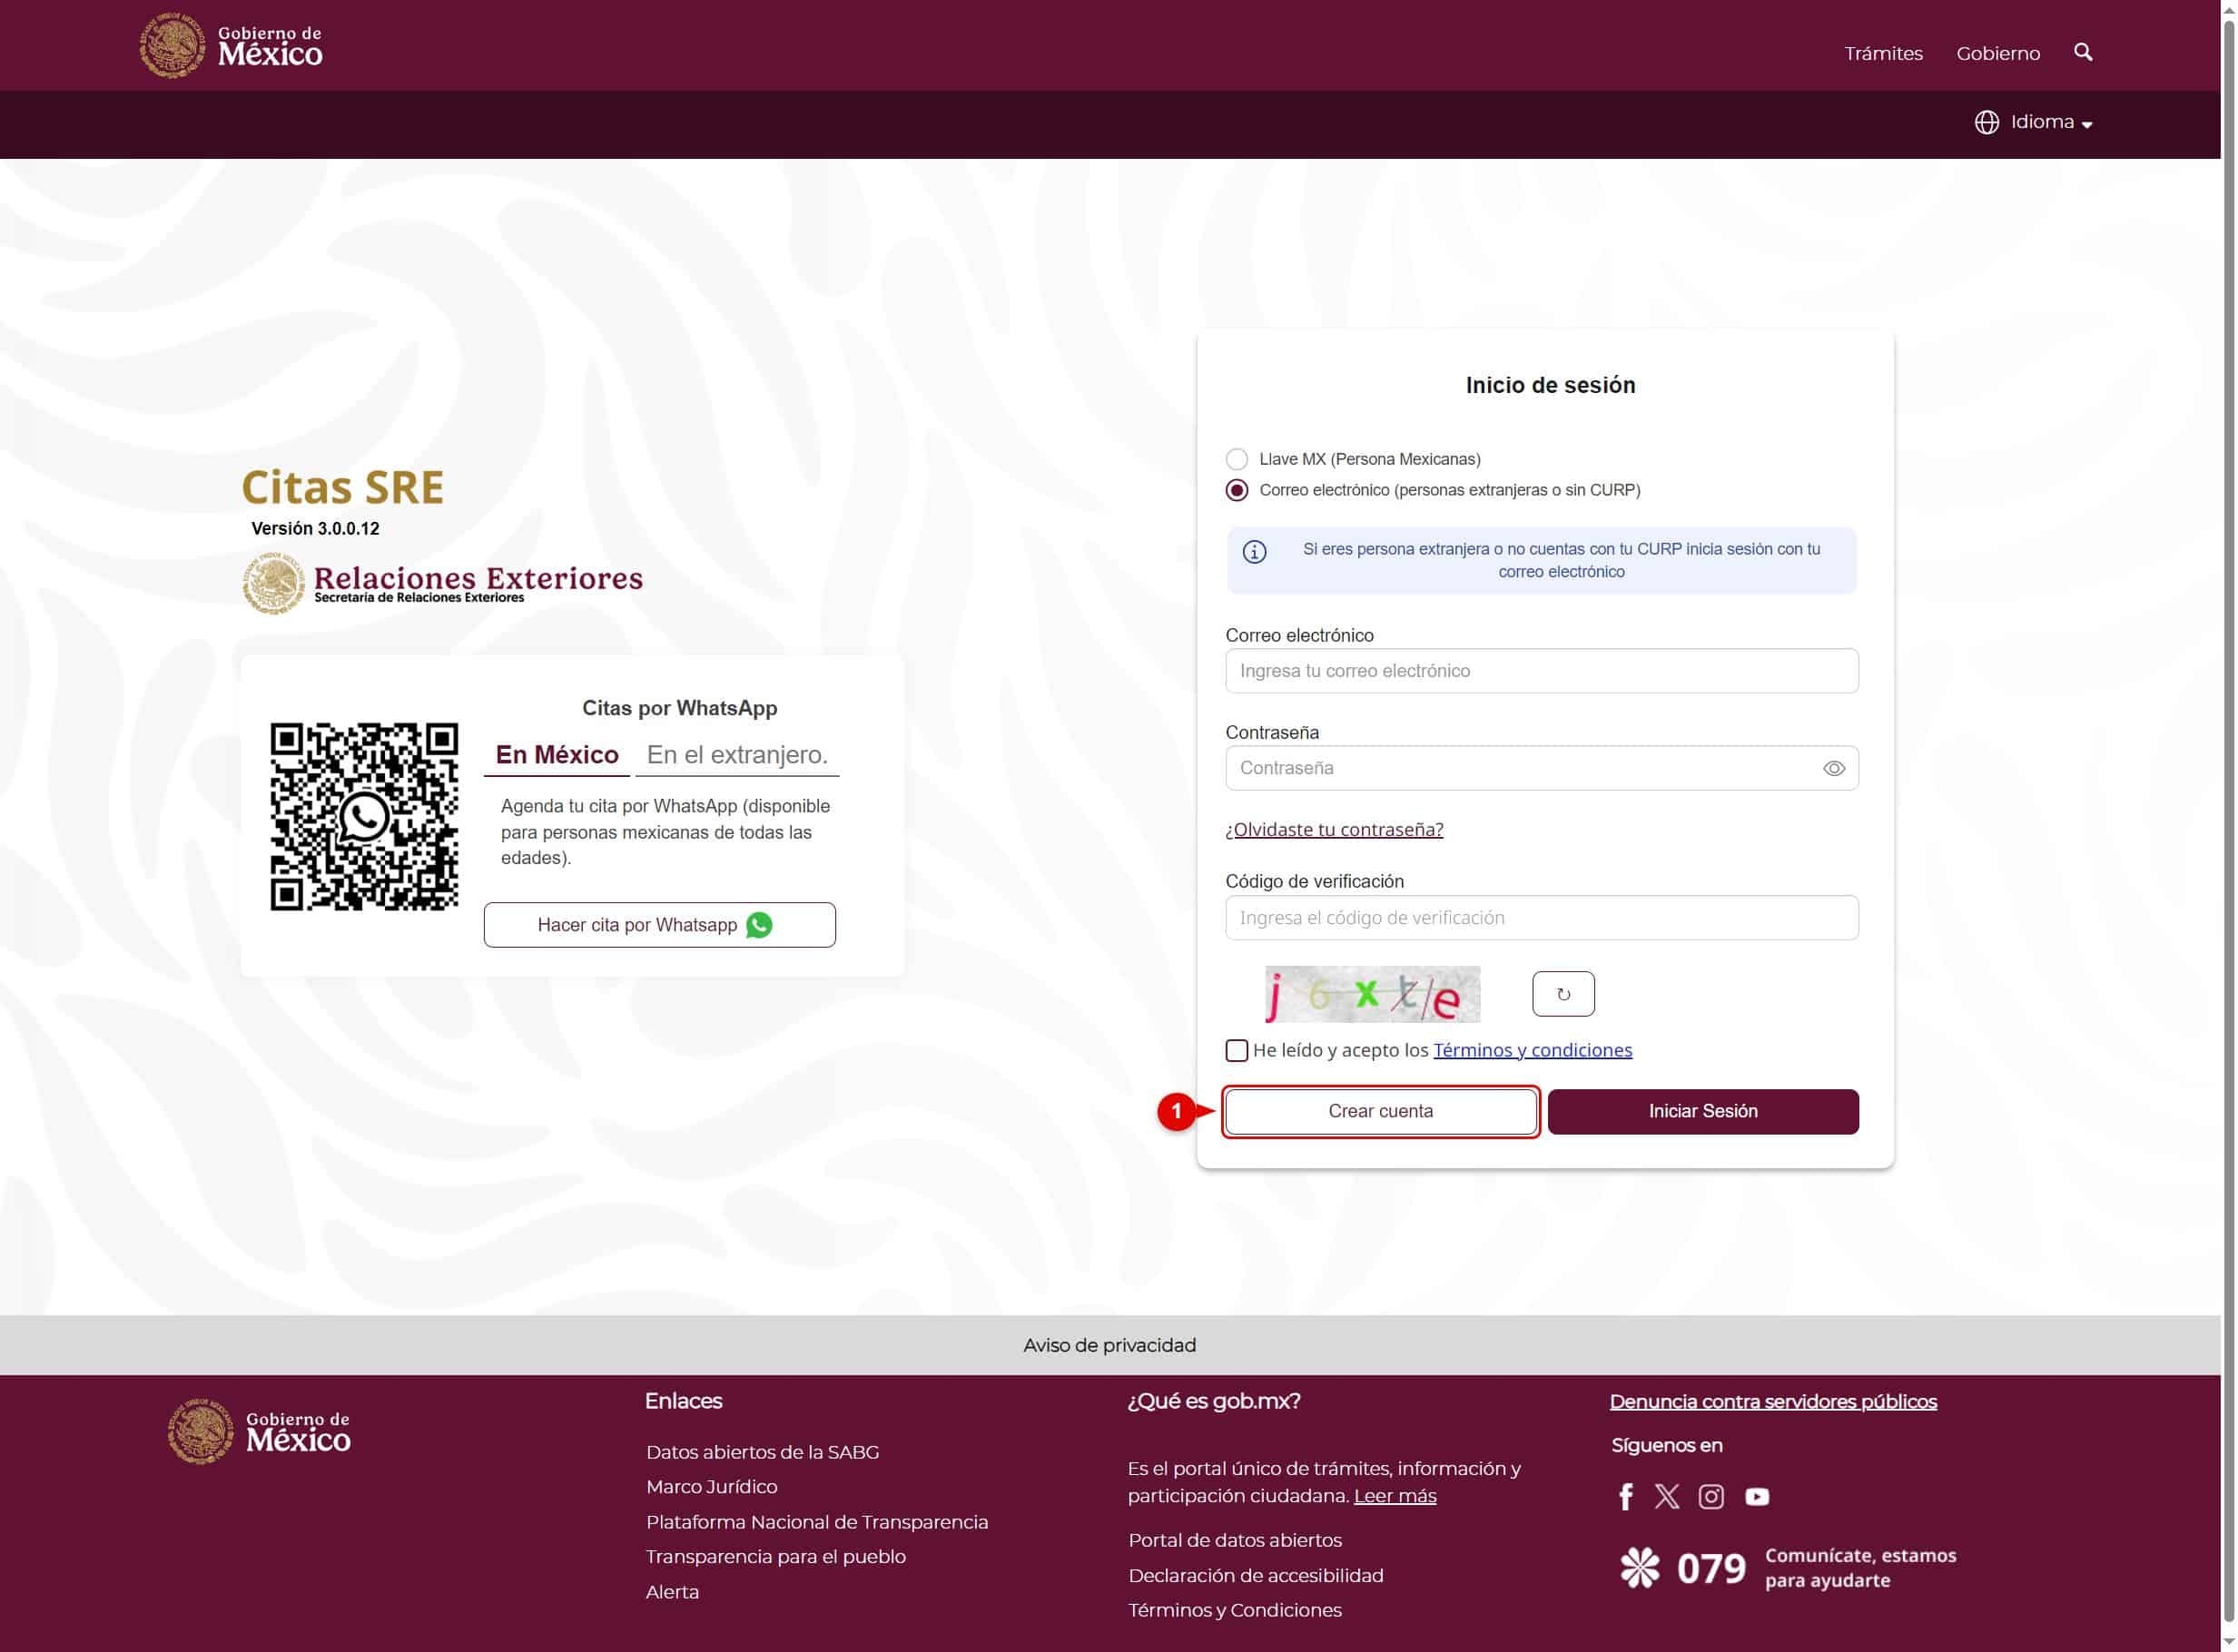
1. Click “Create account”
Go to https://citas.sre.gob.mx.
On the login screen, click the “Create account” button (number 1). You’ll find it at the bottom left, next to “Log in.”
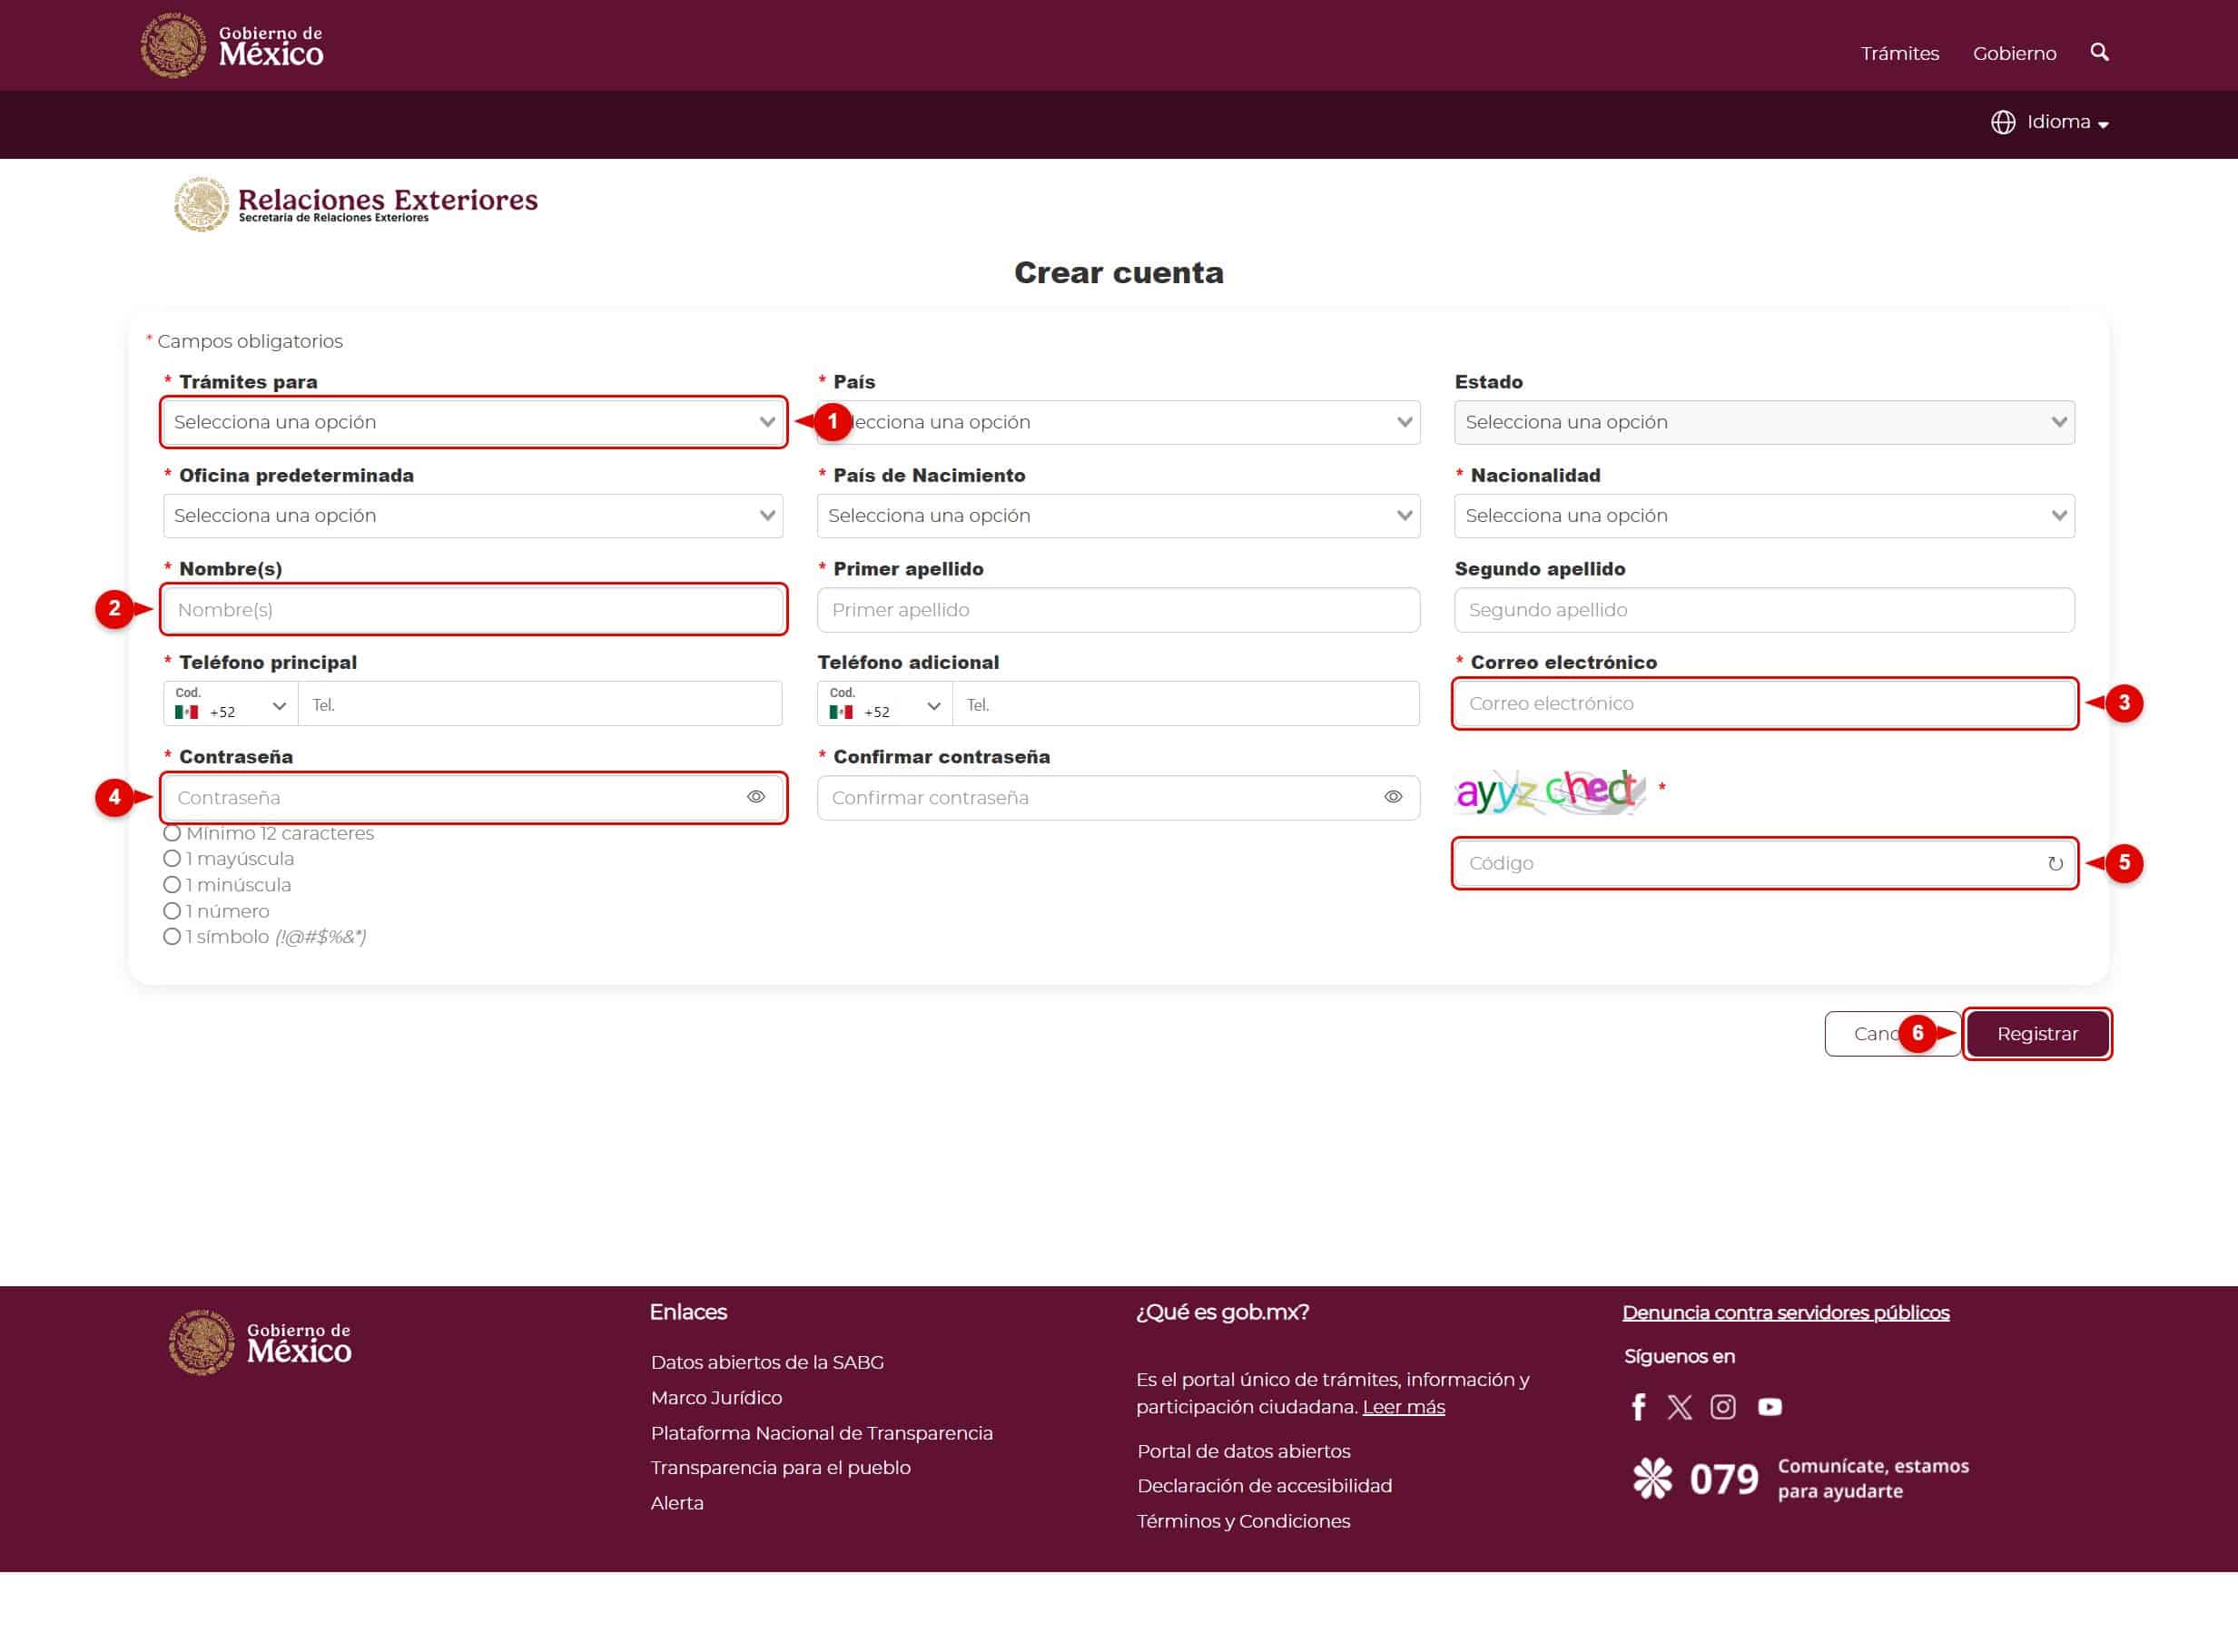
2. Fill out the registration form
The registration form will open. Complete all fields marked with an asterisk (*):
- Select Procedures for, Country, State, Default office, Country of birth, and Nationality (number 1).
- Enter your First name(s), First last name, and Second last name (number 2).
- Enter your Main phone number and, most importantly, your Email address (number 3): that’s where you’ll receive your account confirmation.
- Create a Password and confirm it (number 4). It must be at least 12 characters long and include an uppercase letter, a lowercase letter, a number, and a symbol.
- Enter the Verification code shown in the image (number 5).
To finish, click “Register” (number 6). You’ll receive an email to confirm and activate your account.
How to log in to https://citas.sre.gob.mx, step by step
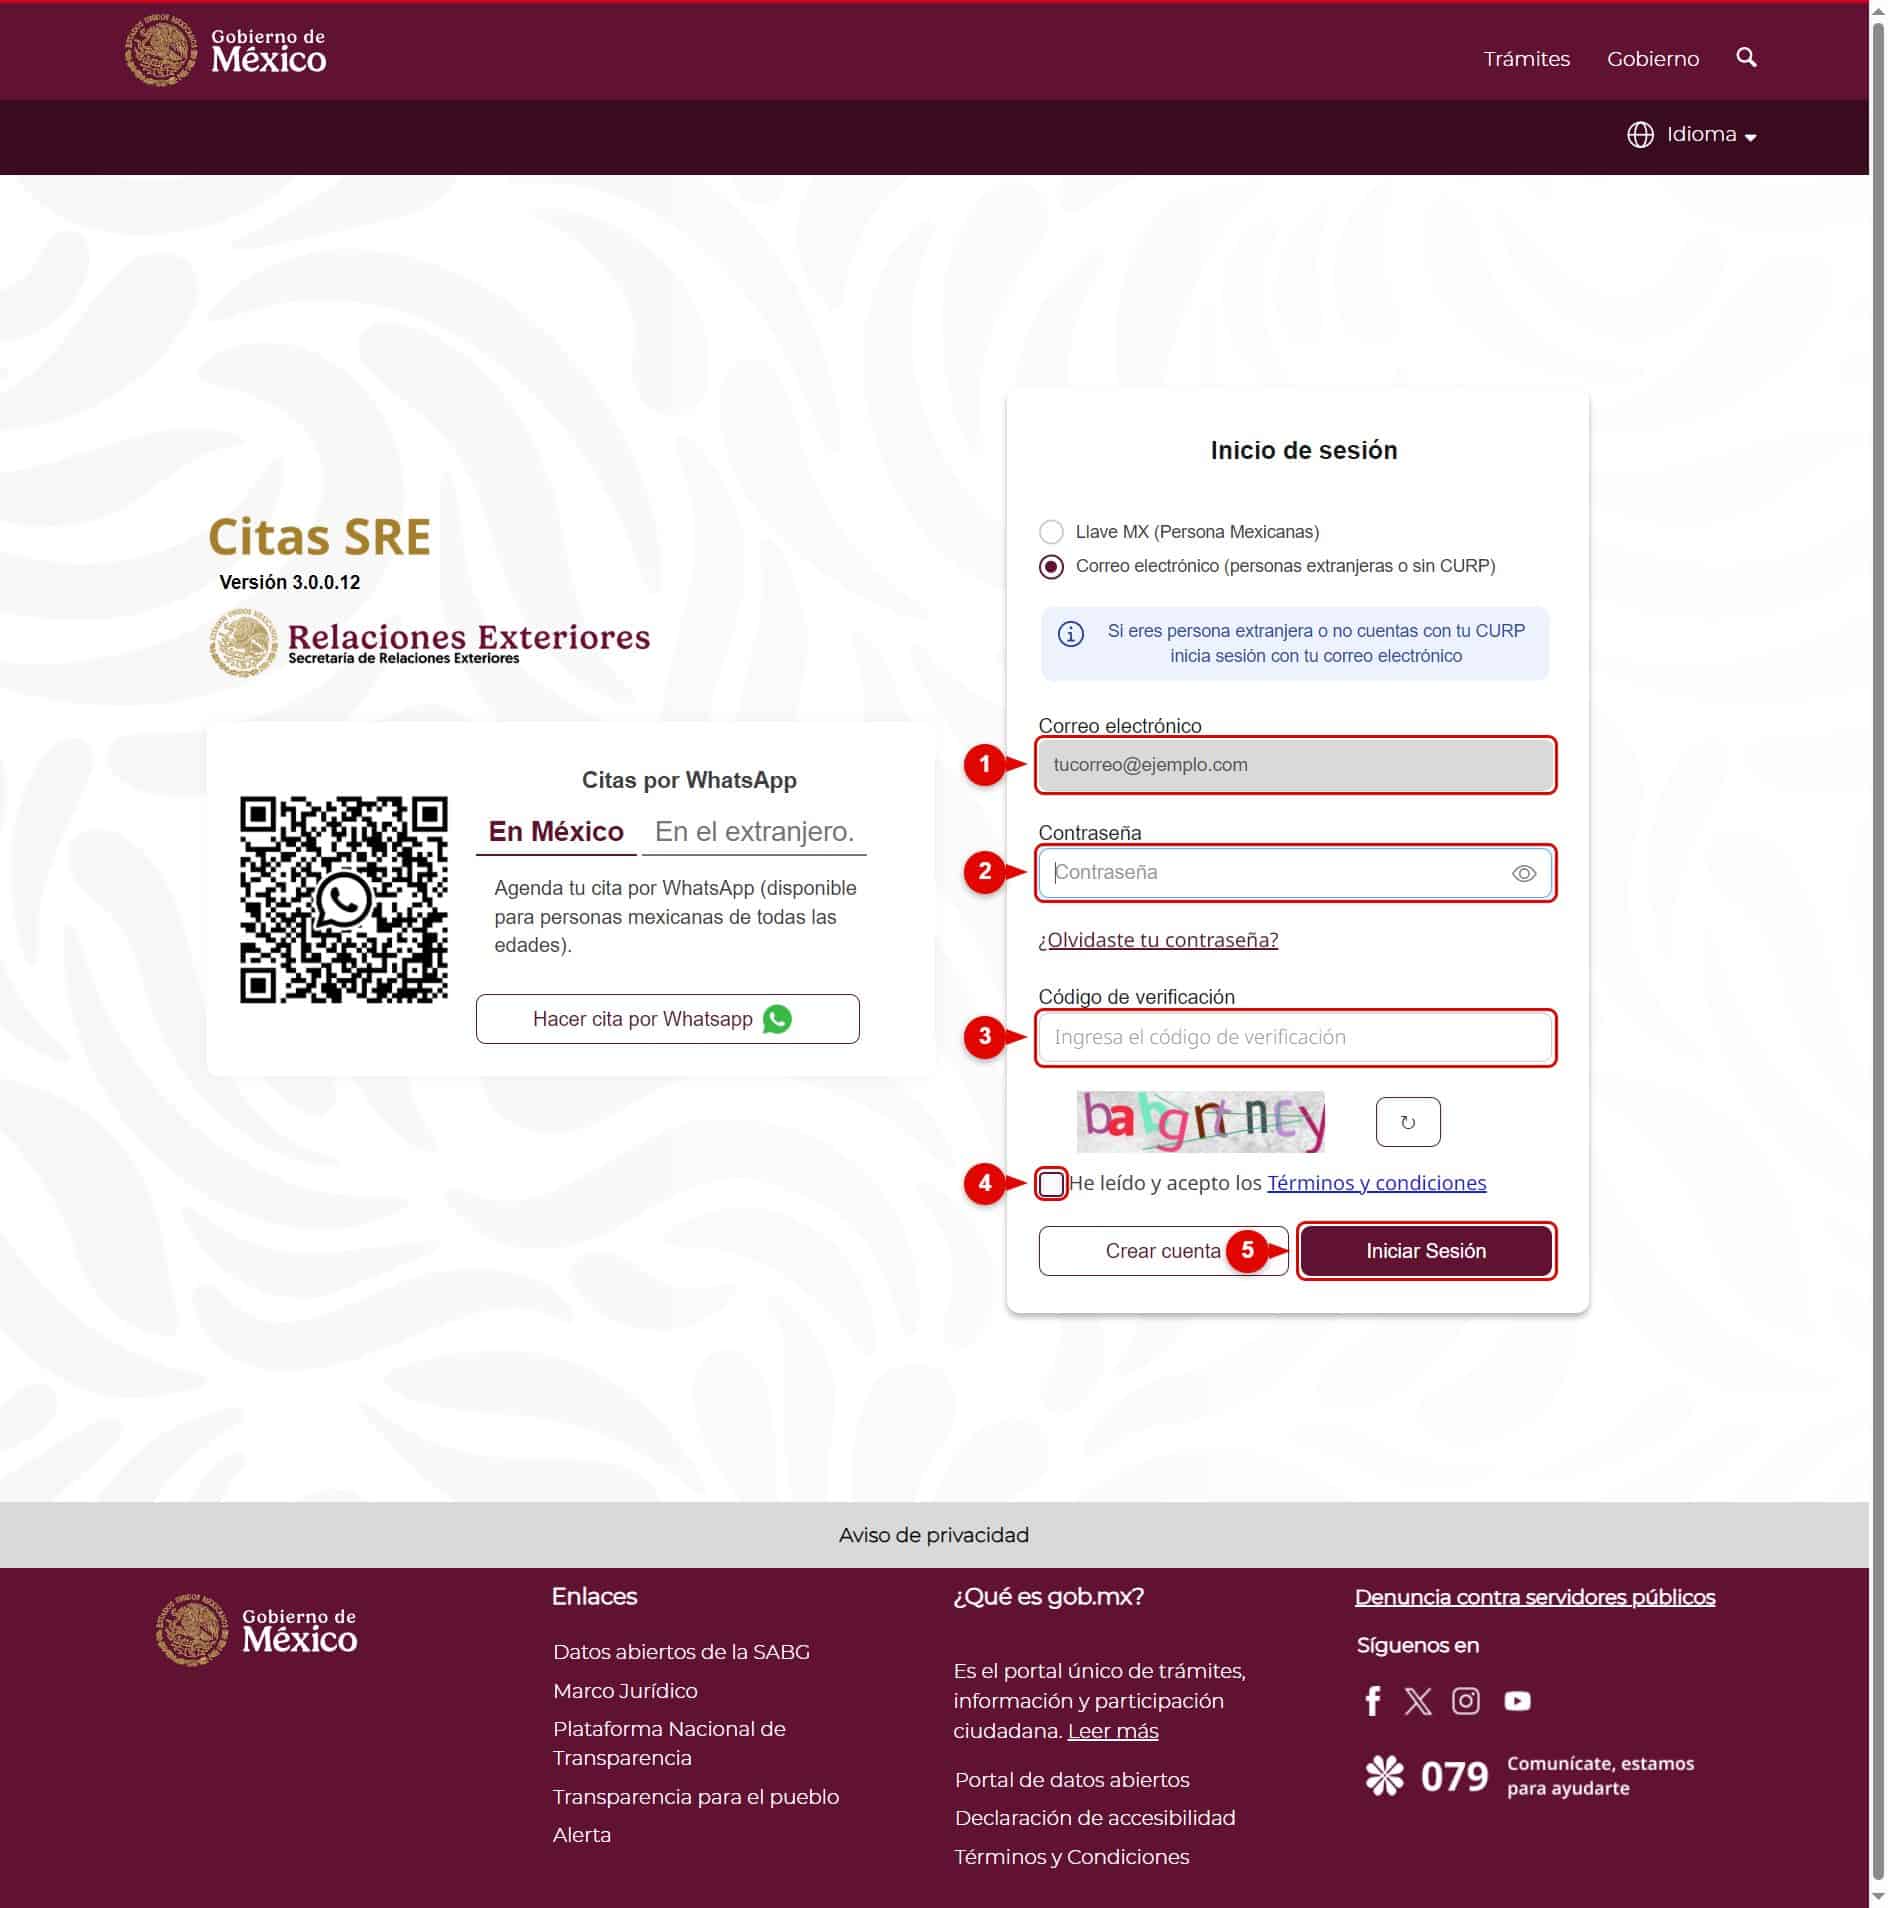
Log in
Go to https://citas.sre.gob.mx and choose the type of login: Llave MX if you are Mexican, or Email if you are a foreign national or don’t have a CURP.
Enter your email address (number 1) and your password (number 2).
Enter the verification code shown in the image (number 3) and check the box “I have read and accept the terms and conditions” (number 4).
Finally, click “Log in” (number 5).
How to book a consular appointment on https://citas.sre.gob.mx, step by step
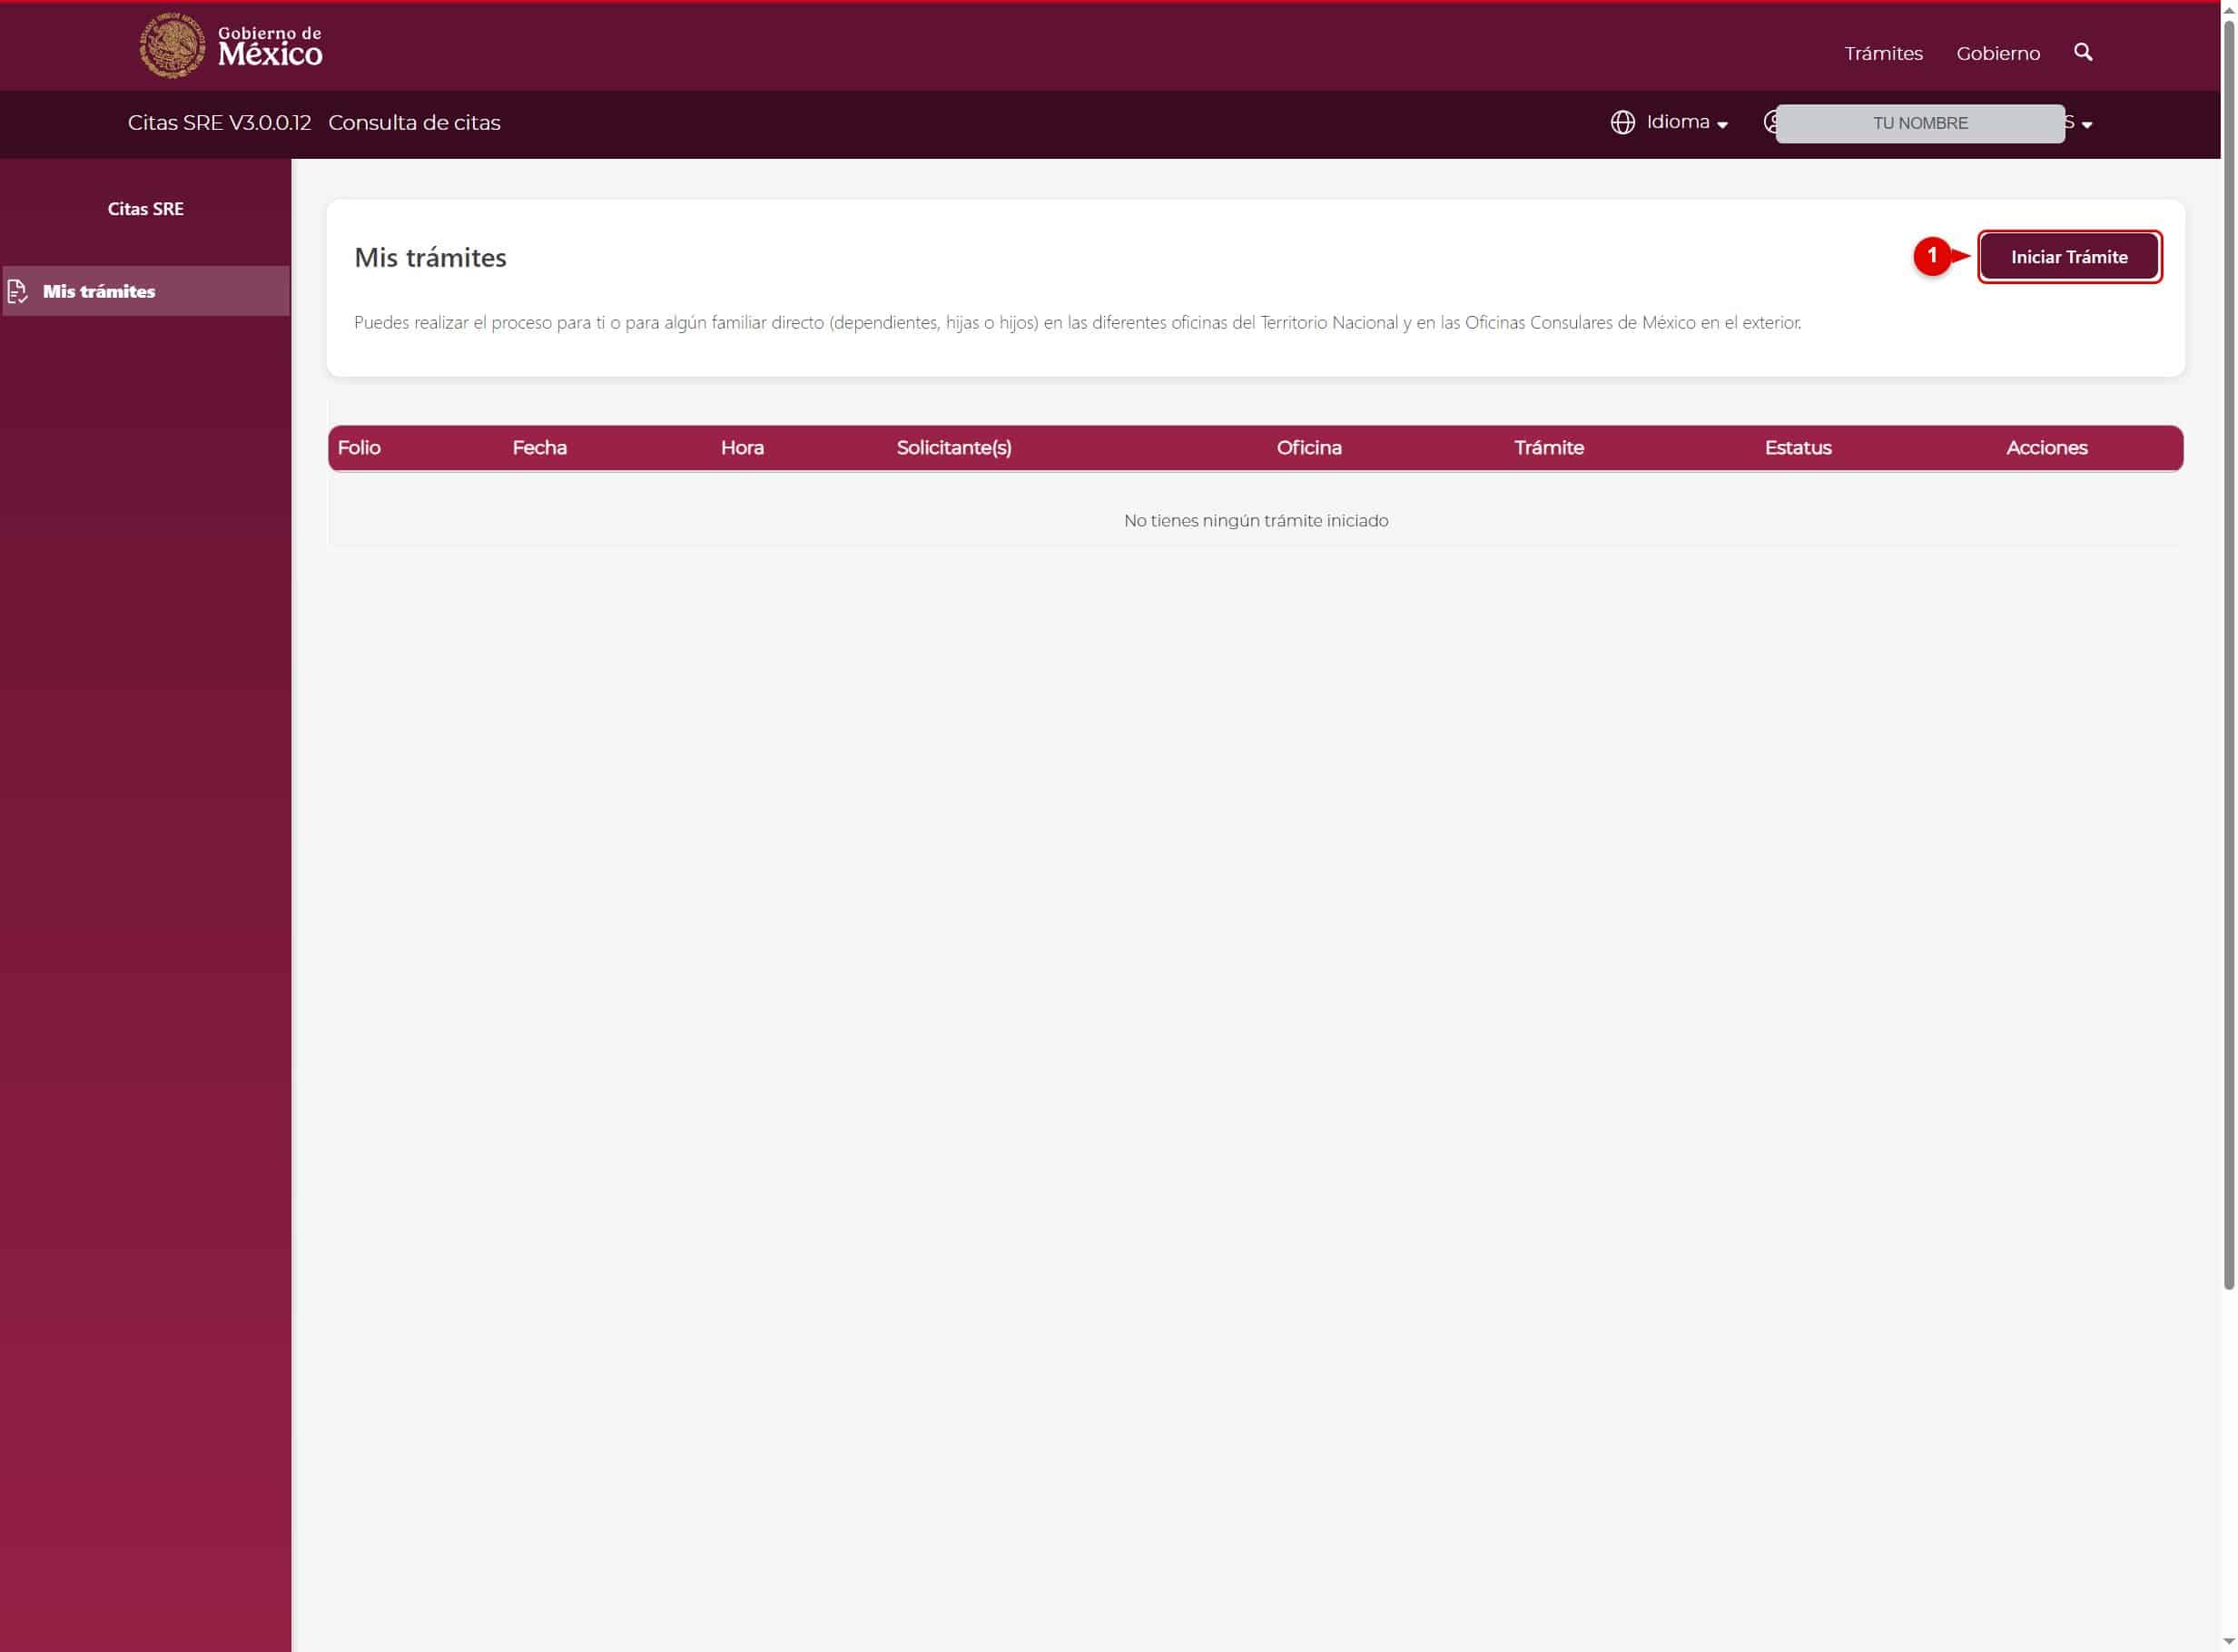
1. Start a procedure
Once you’re in, you’ll see the “My procedures” screen.
To begin, click the “Start Procedure” button (number 1).
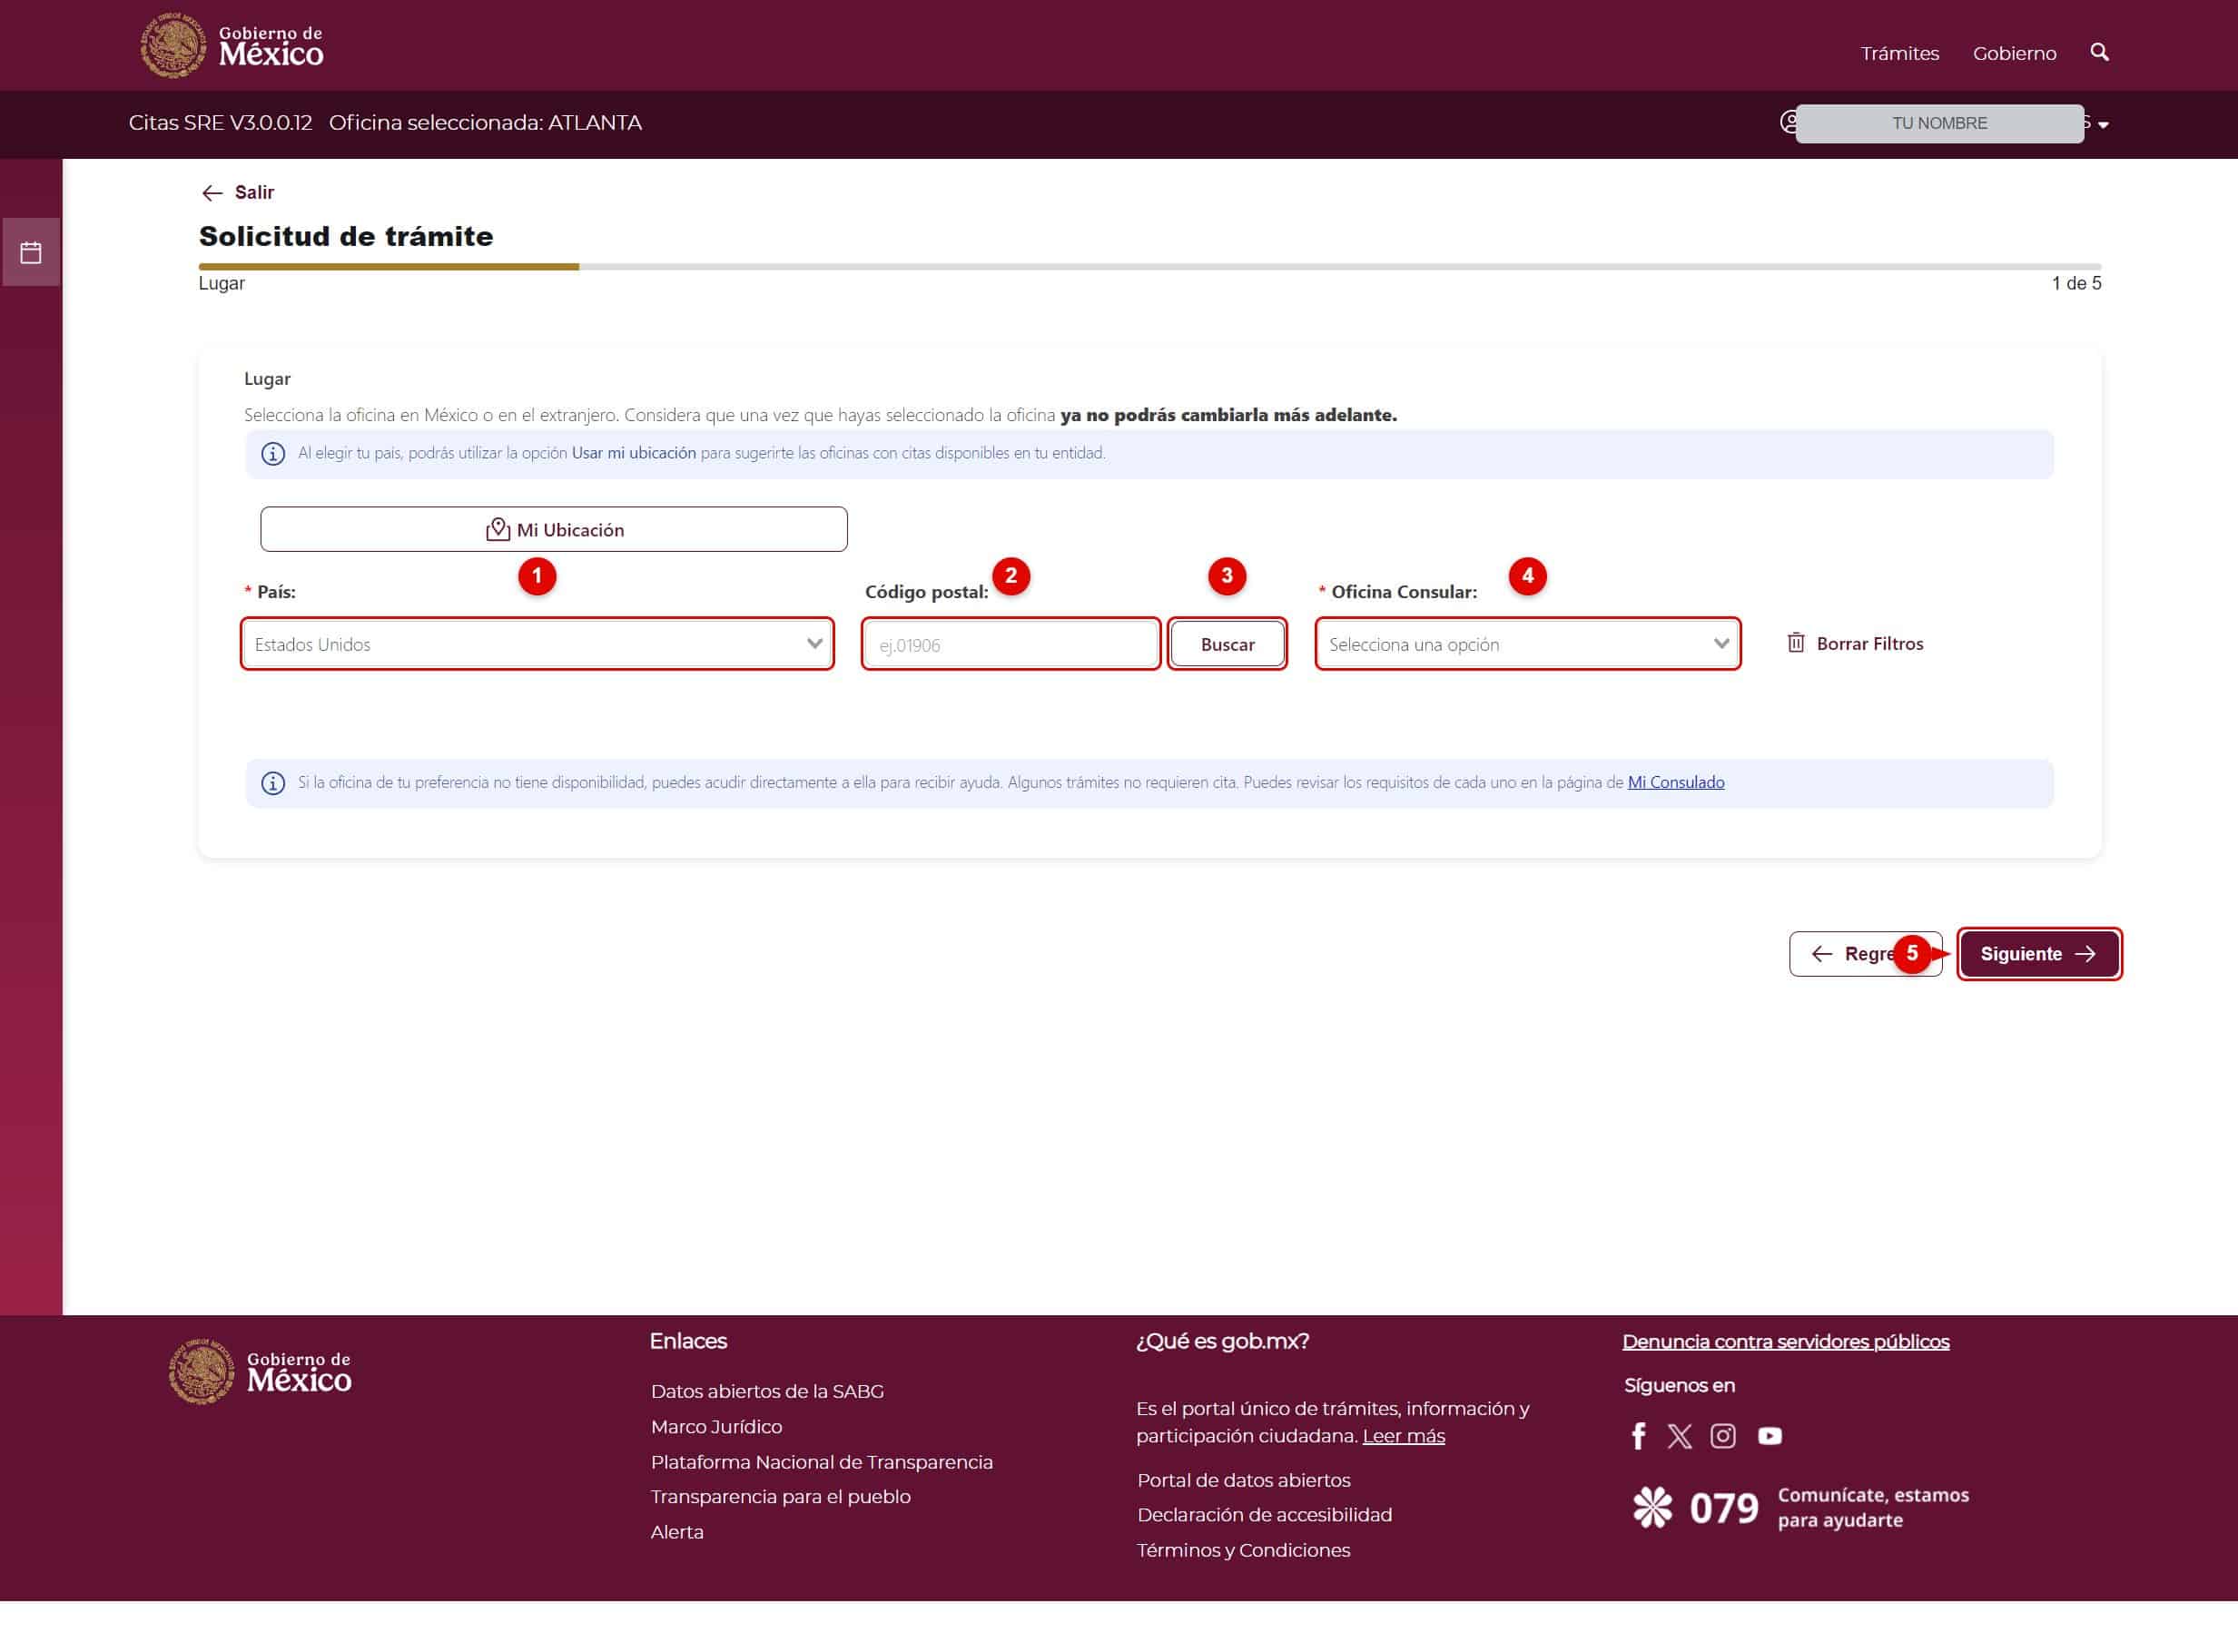
2. Step 1: Choose the location (office)
In Step 1 of 5 (Location), select the Country (number 1), enter your ZIP code (number 2), and click “Search” (number 3).
Then choose the Consular Office (number 4) and click “Next” (number 5).
Important: once you select the office, you won’t be able to change it later.
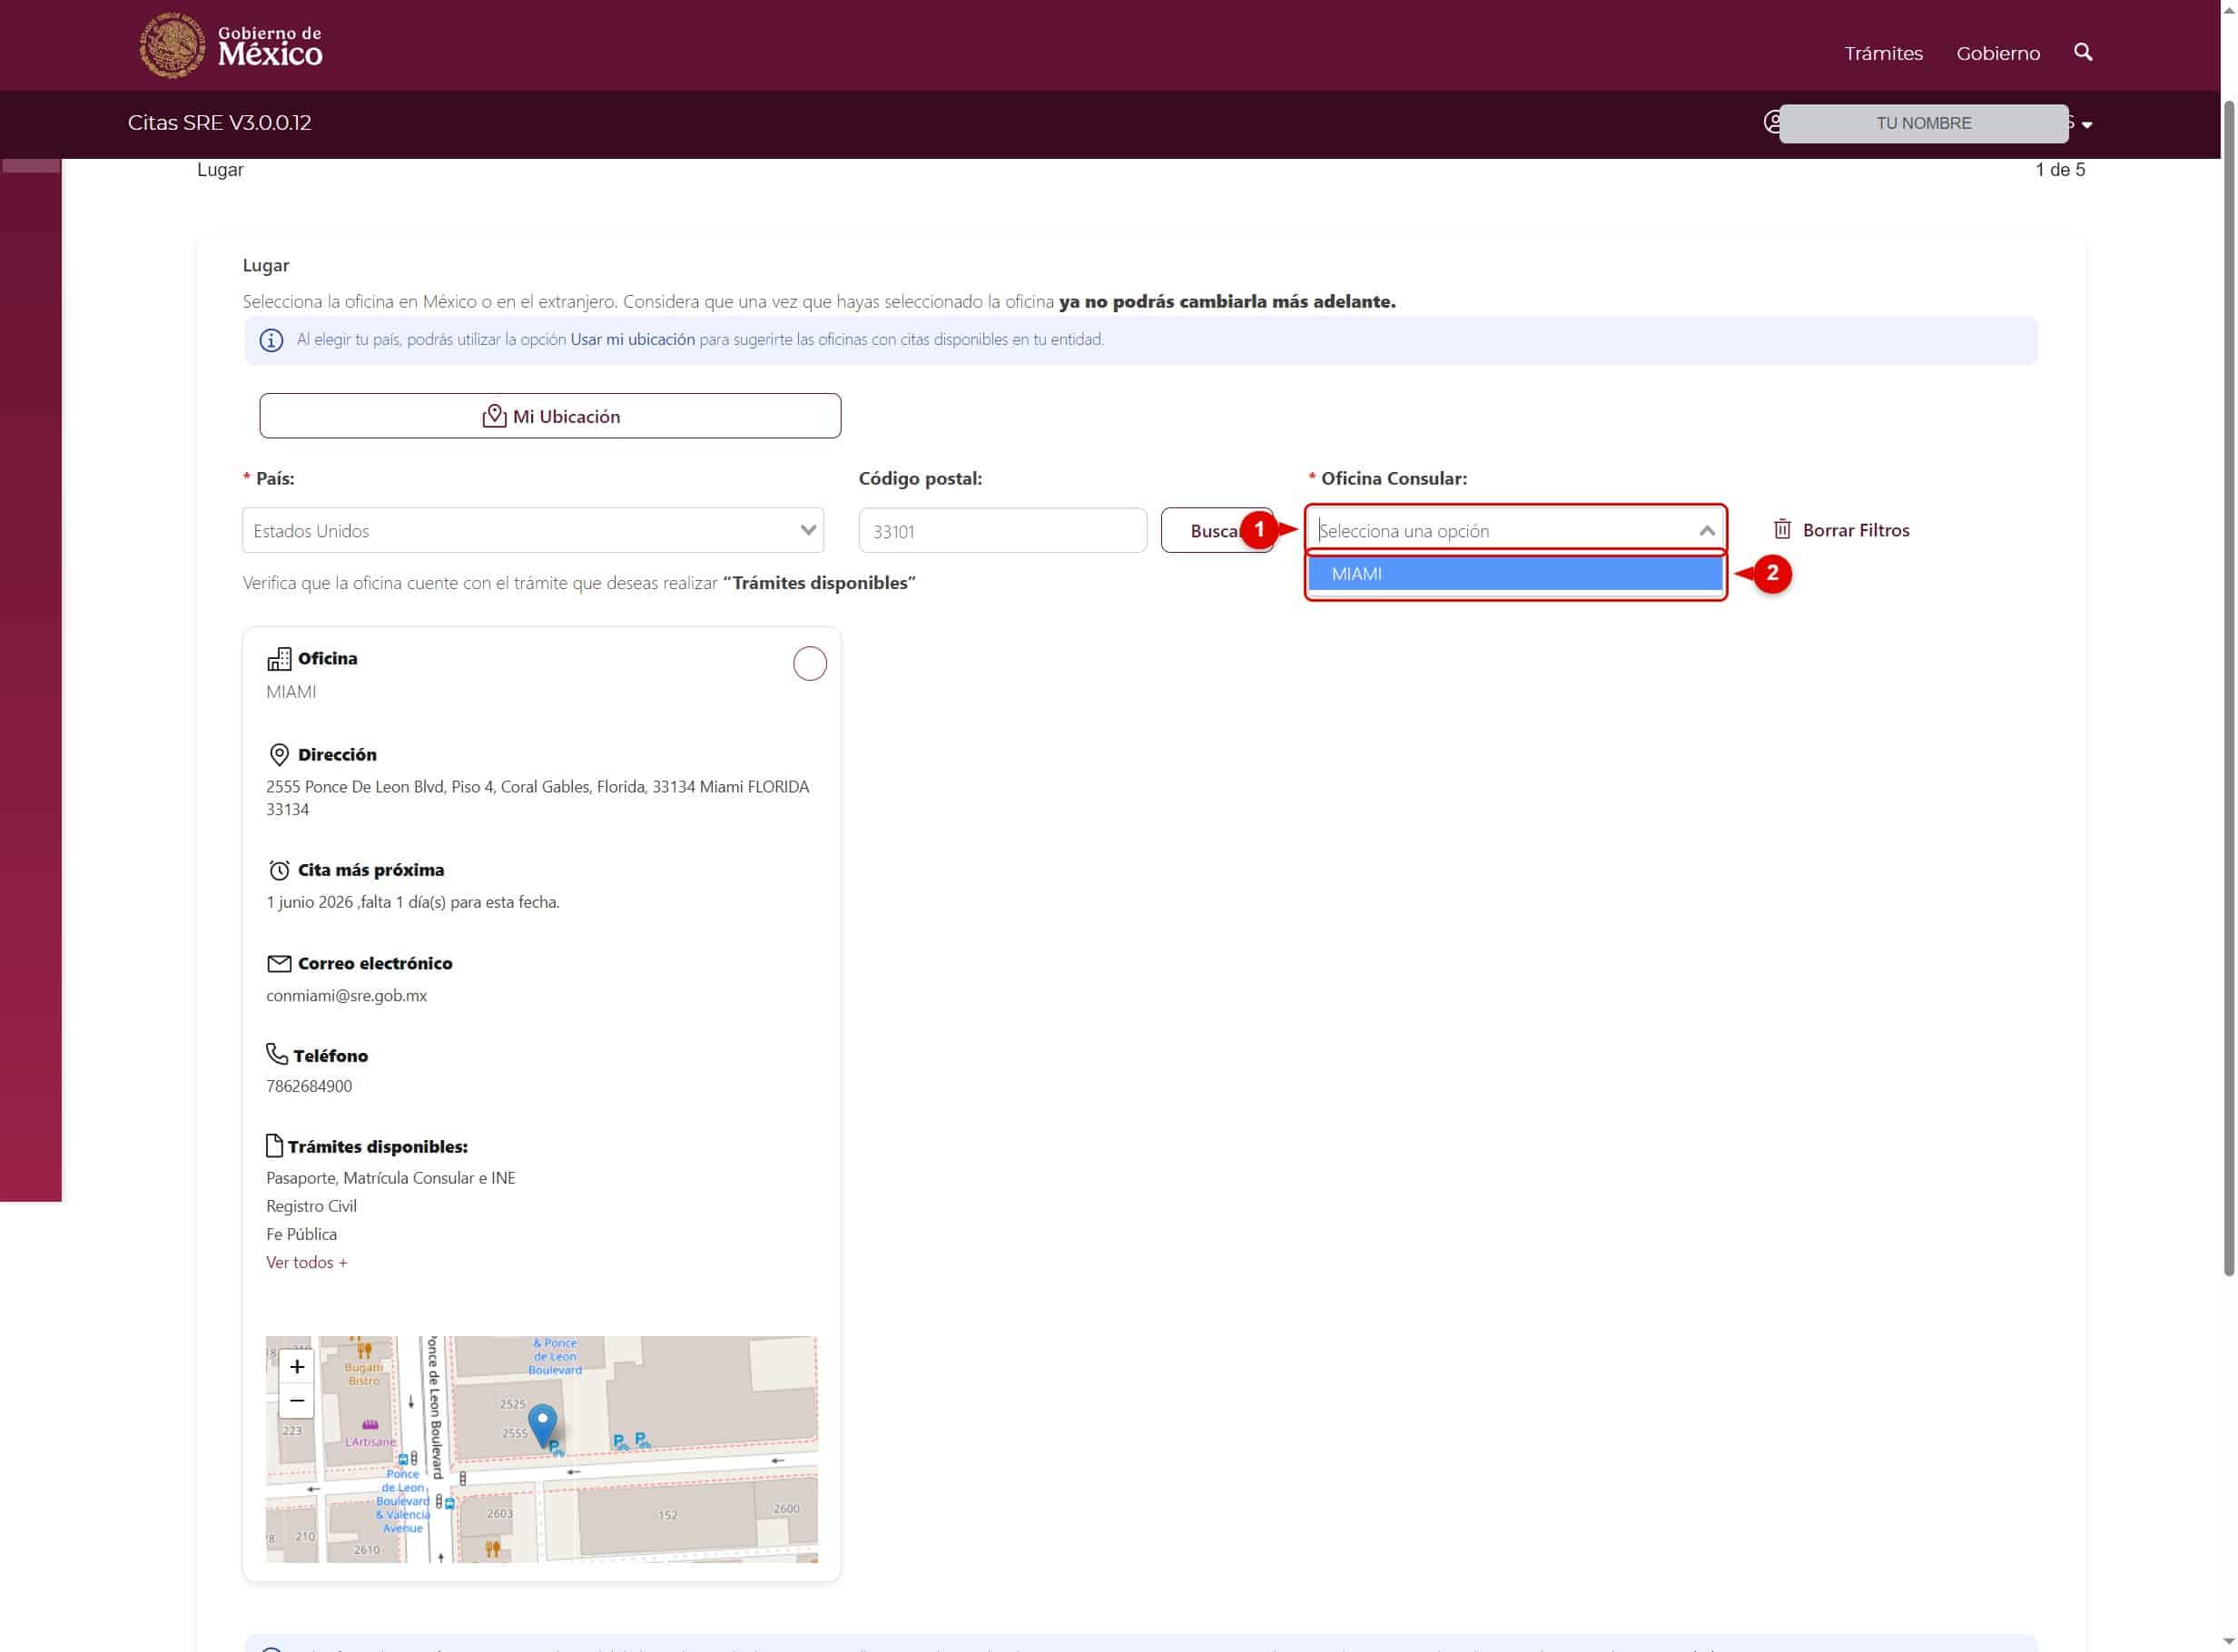
3. Select the Consular Office
When you open the “Consular Office” menu (number 1), the offices near your ZIP code will appear.
Select the one that applies to you (number 2). You’ll see its address, the next available appointment, phone number, and the procedures it offers.
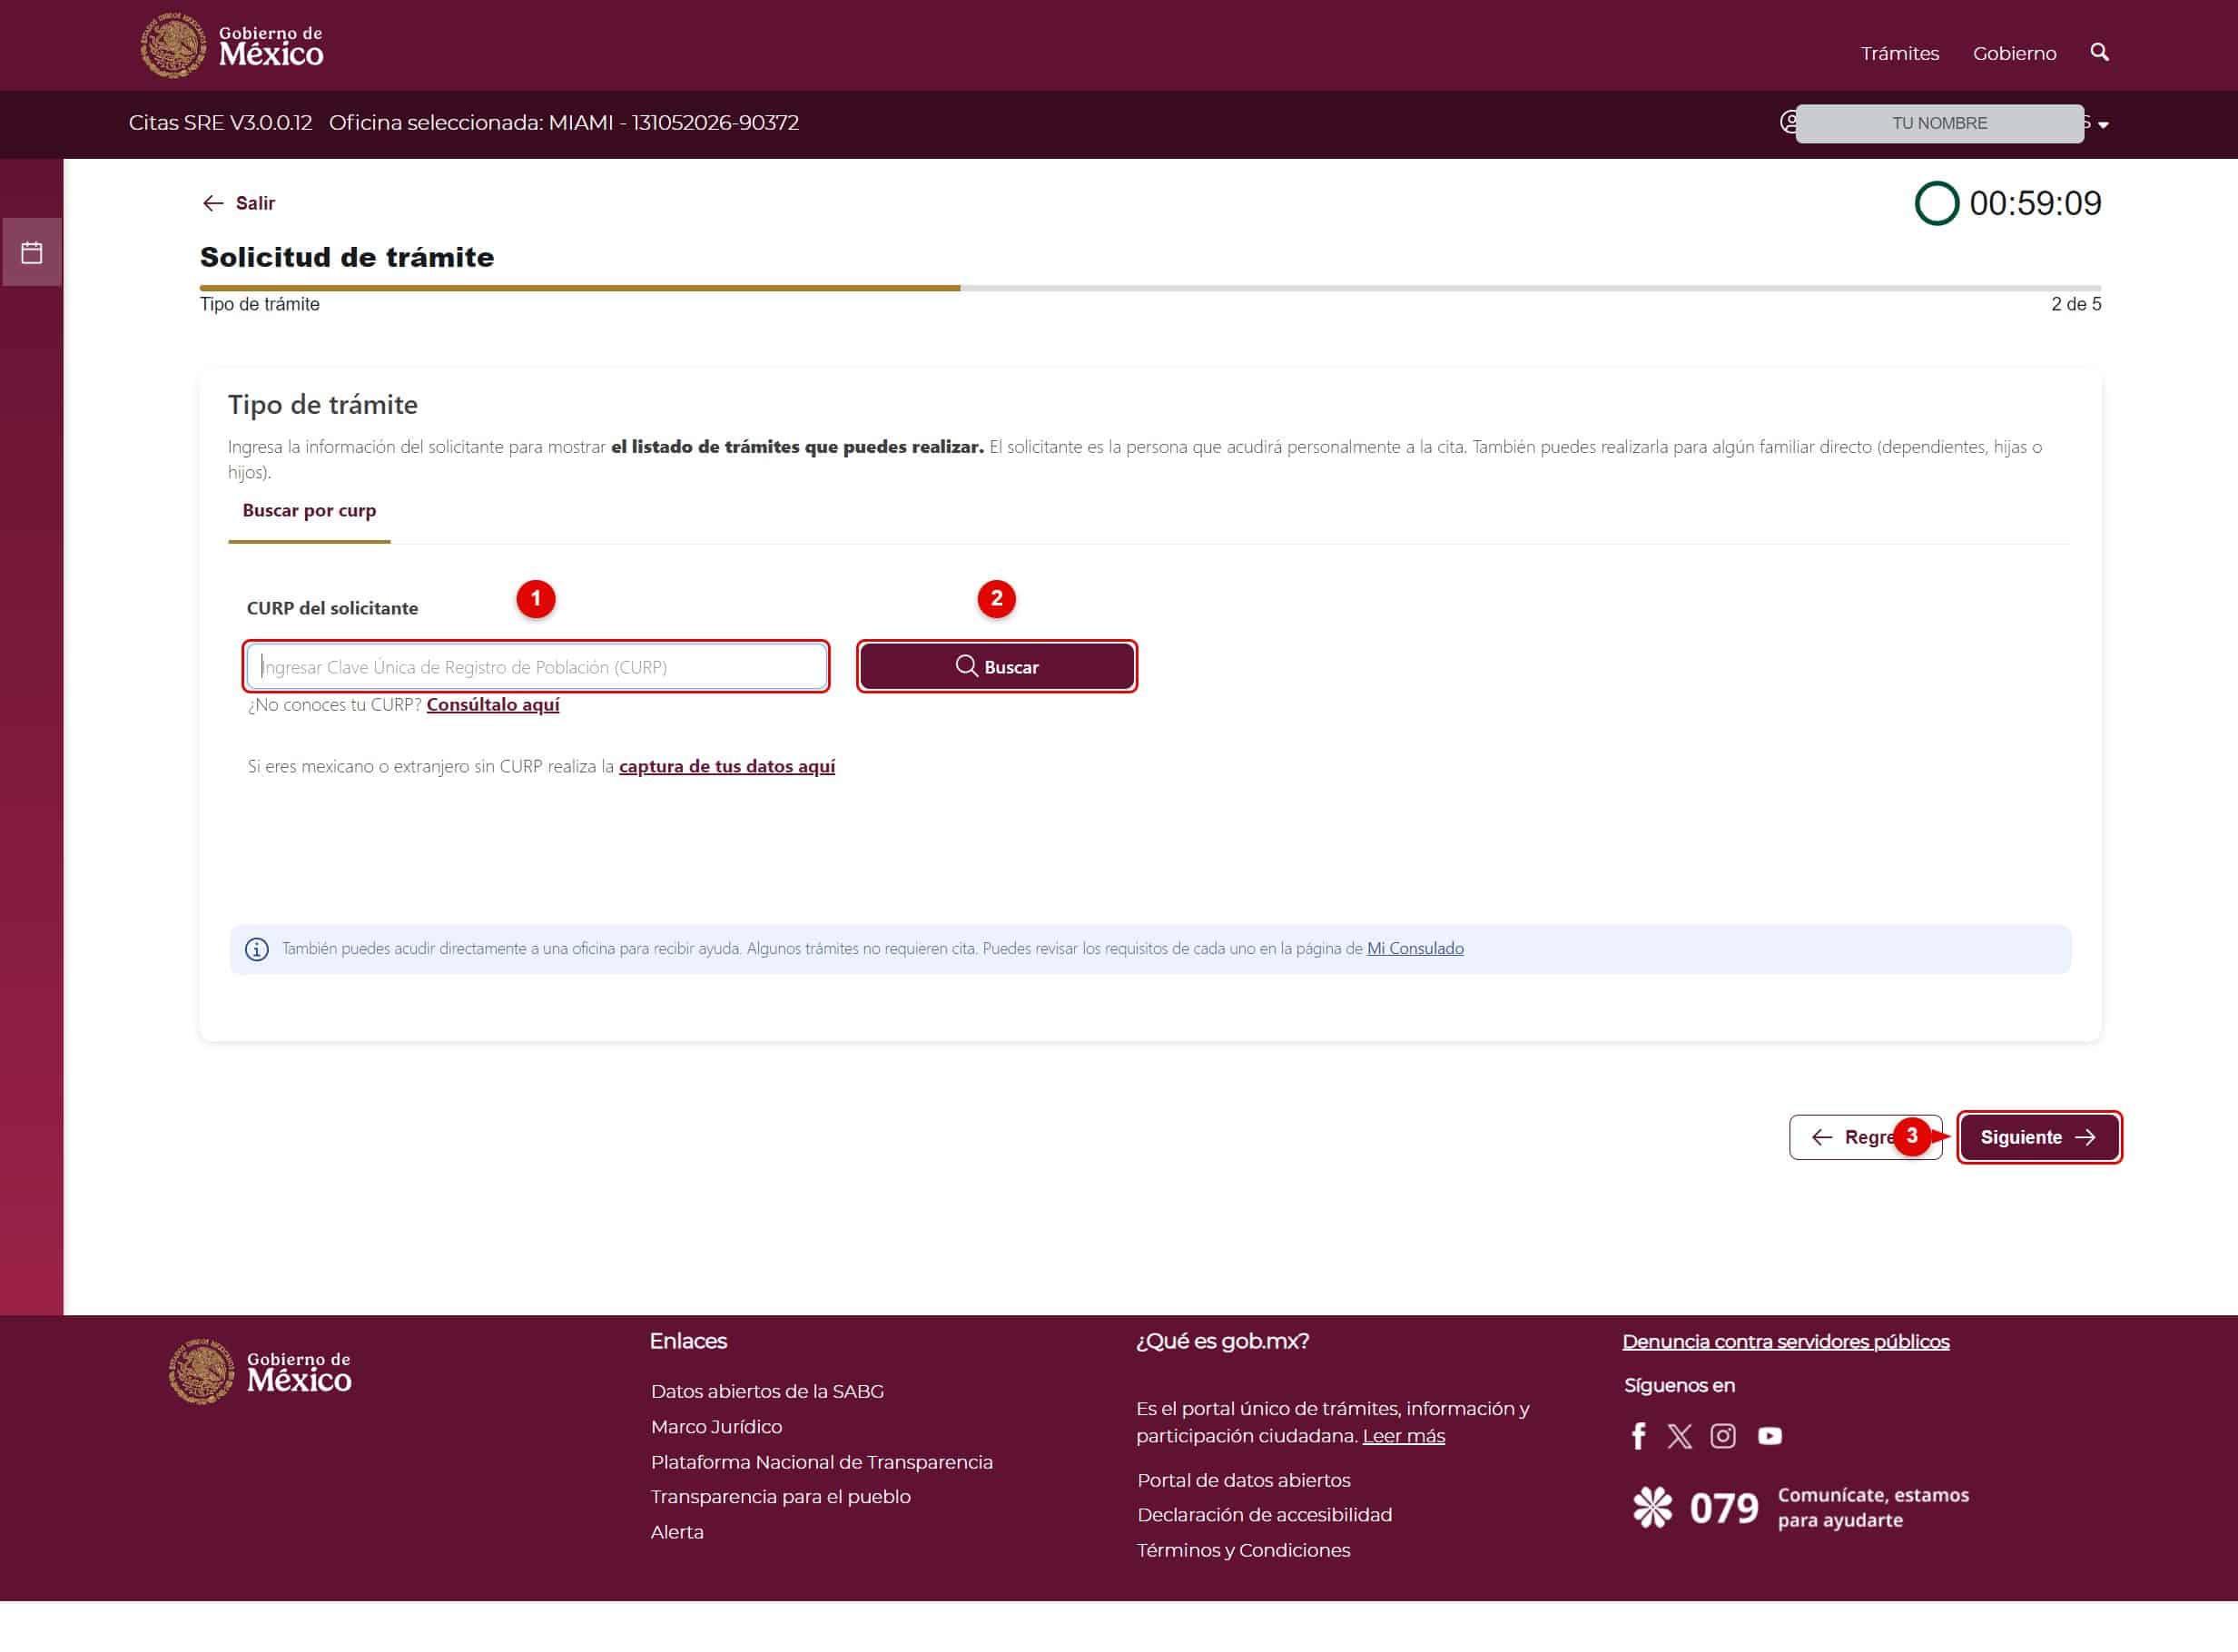
4. Step 2: Identify the applicant (CURP)
In Step 2 of 5 (Type of procedure), enter the applicant’s CURP (number 1) and click “Search” (number 2). Then click “Next” (number 3).
If you don’t know your CURP, you can look it up using the link shown on the screen. And if you are a foreign national or don’t have a CURP, use the “enter your information here” option.
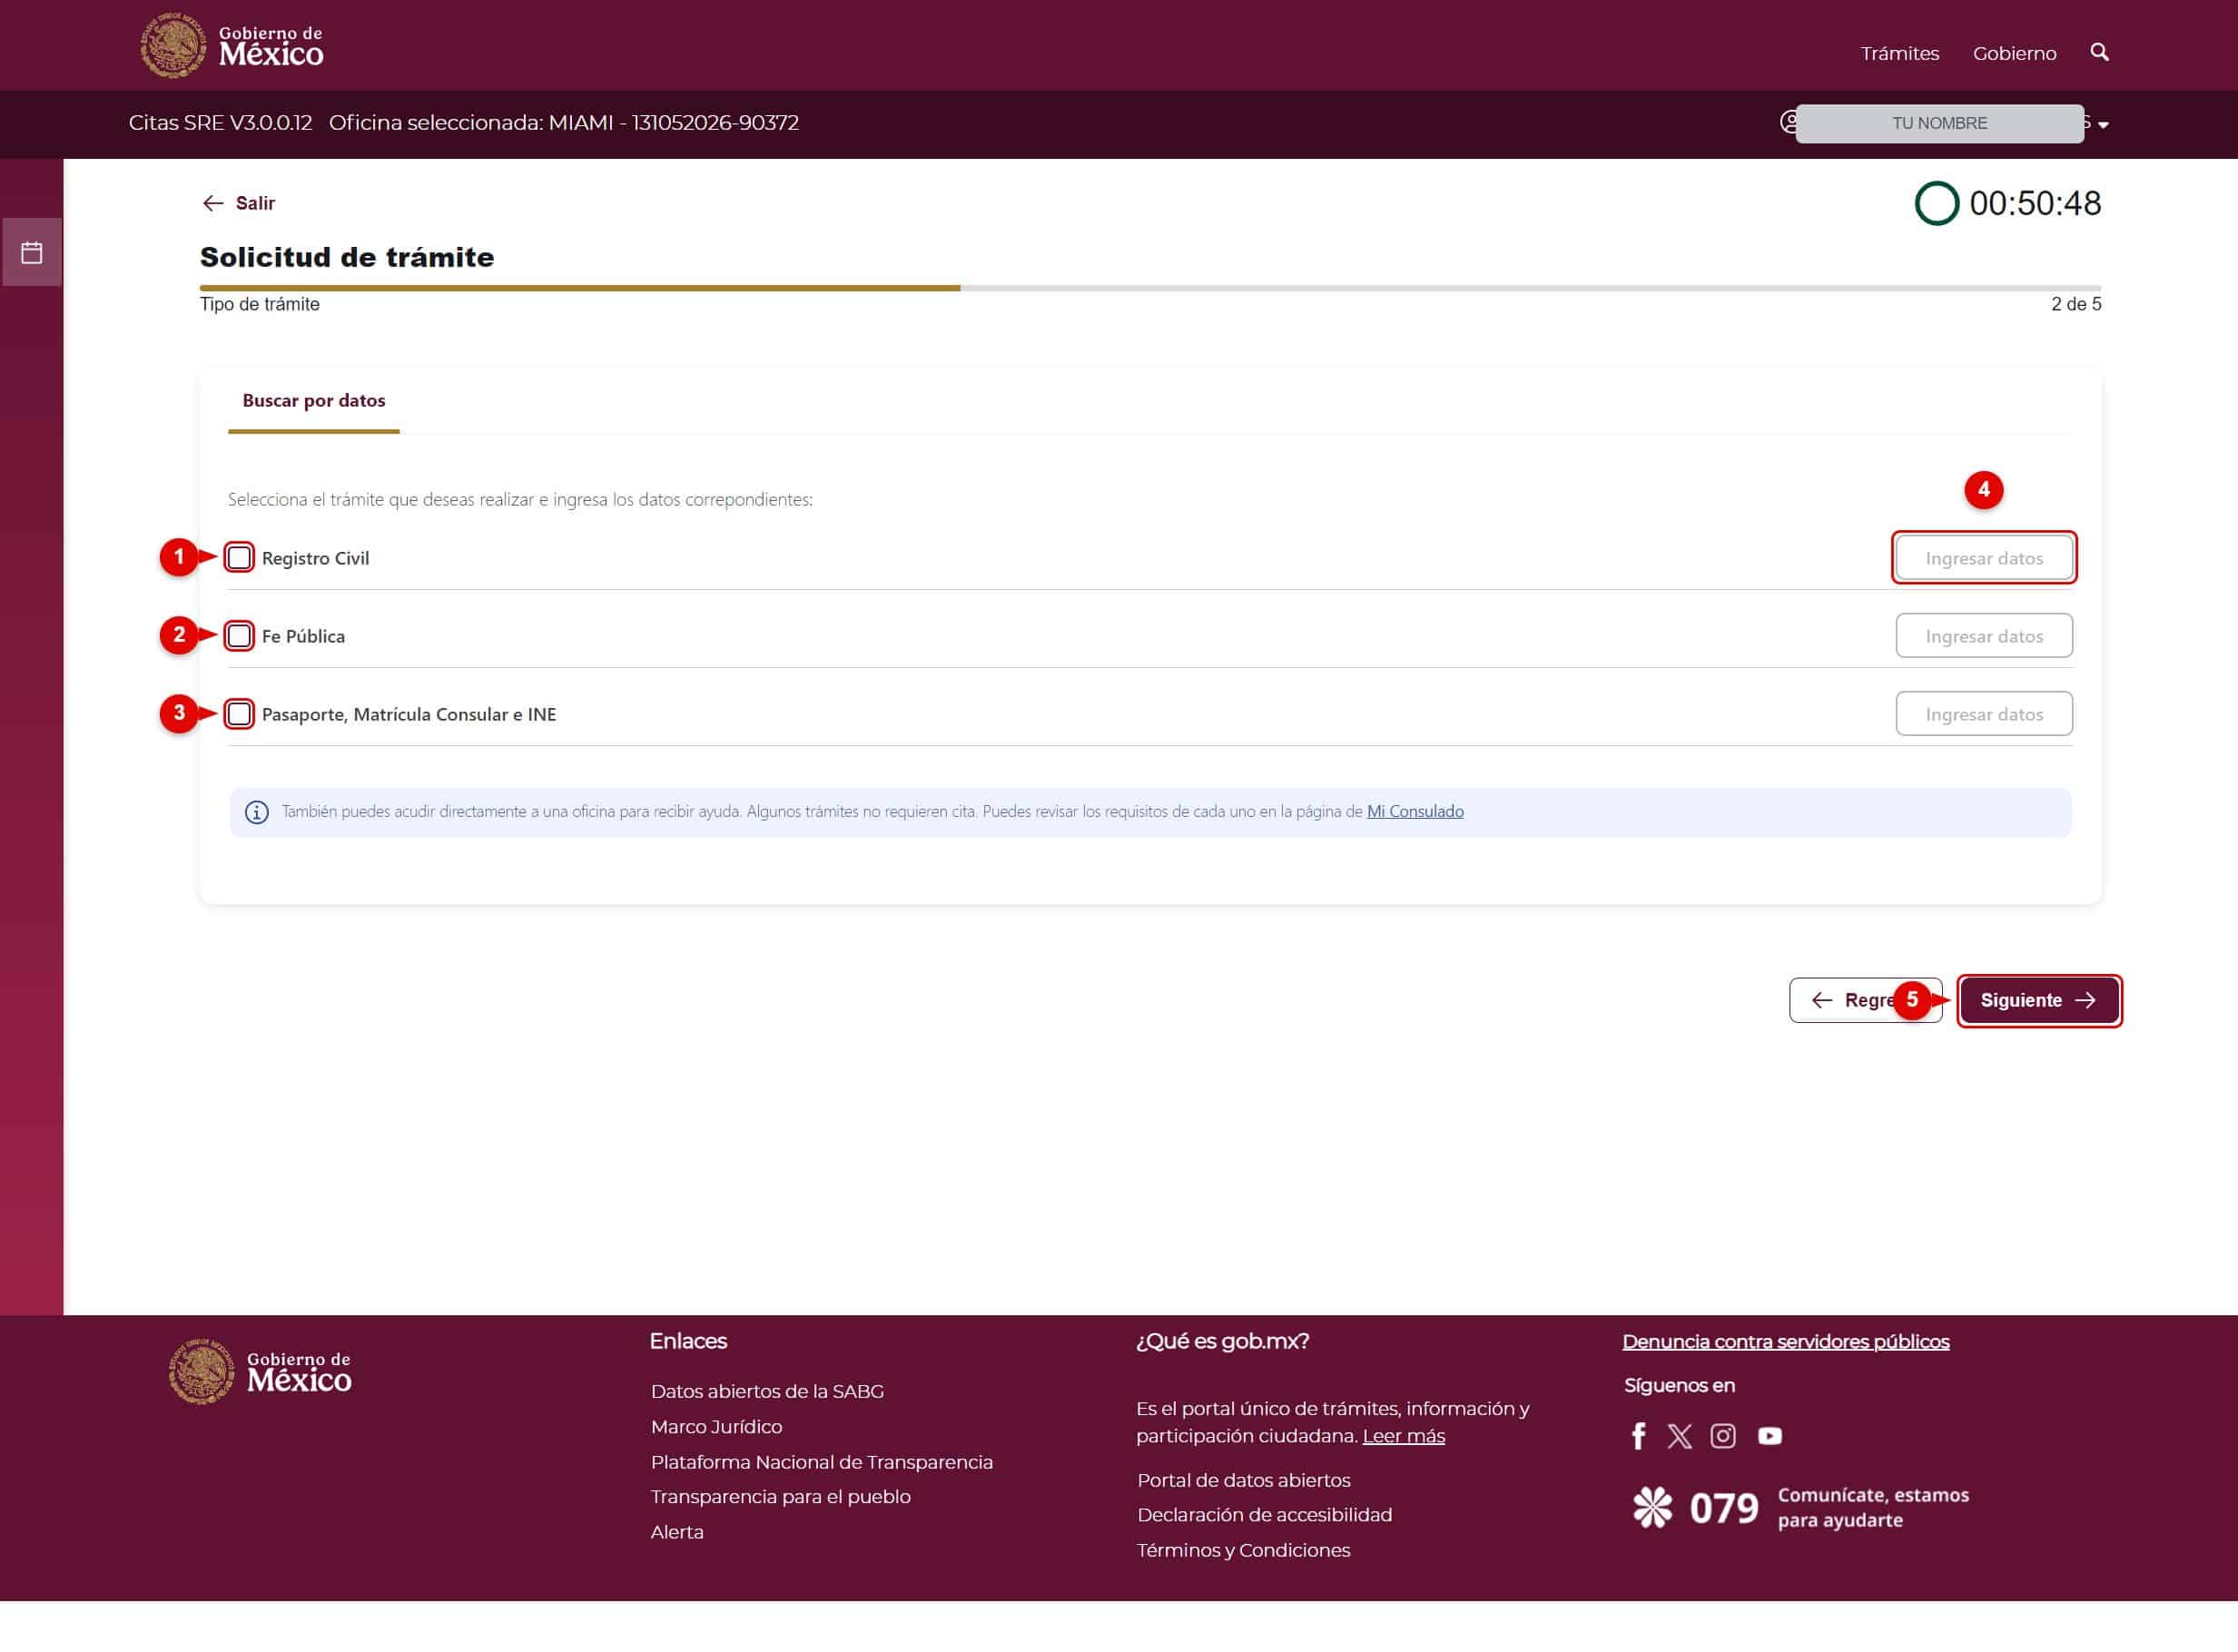
5. Select the procedure
Check the box for the procedure you want to complete: Vital Records (number 1), Notarial services (number 2), or Passport, Consular ID Card, and INE (number 3).
Then click “Enter information” for the selected procedure (number 4) and, finally, “Next” (number 5).
6. Confirm the procedure
Some procedures don’t require additional information. When that’s the case, simply click “Add procedure” (number 1) to continue.
The procedure will be marked as “Information completed”.

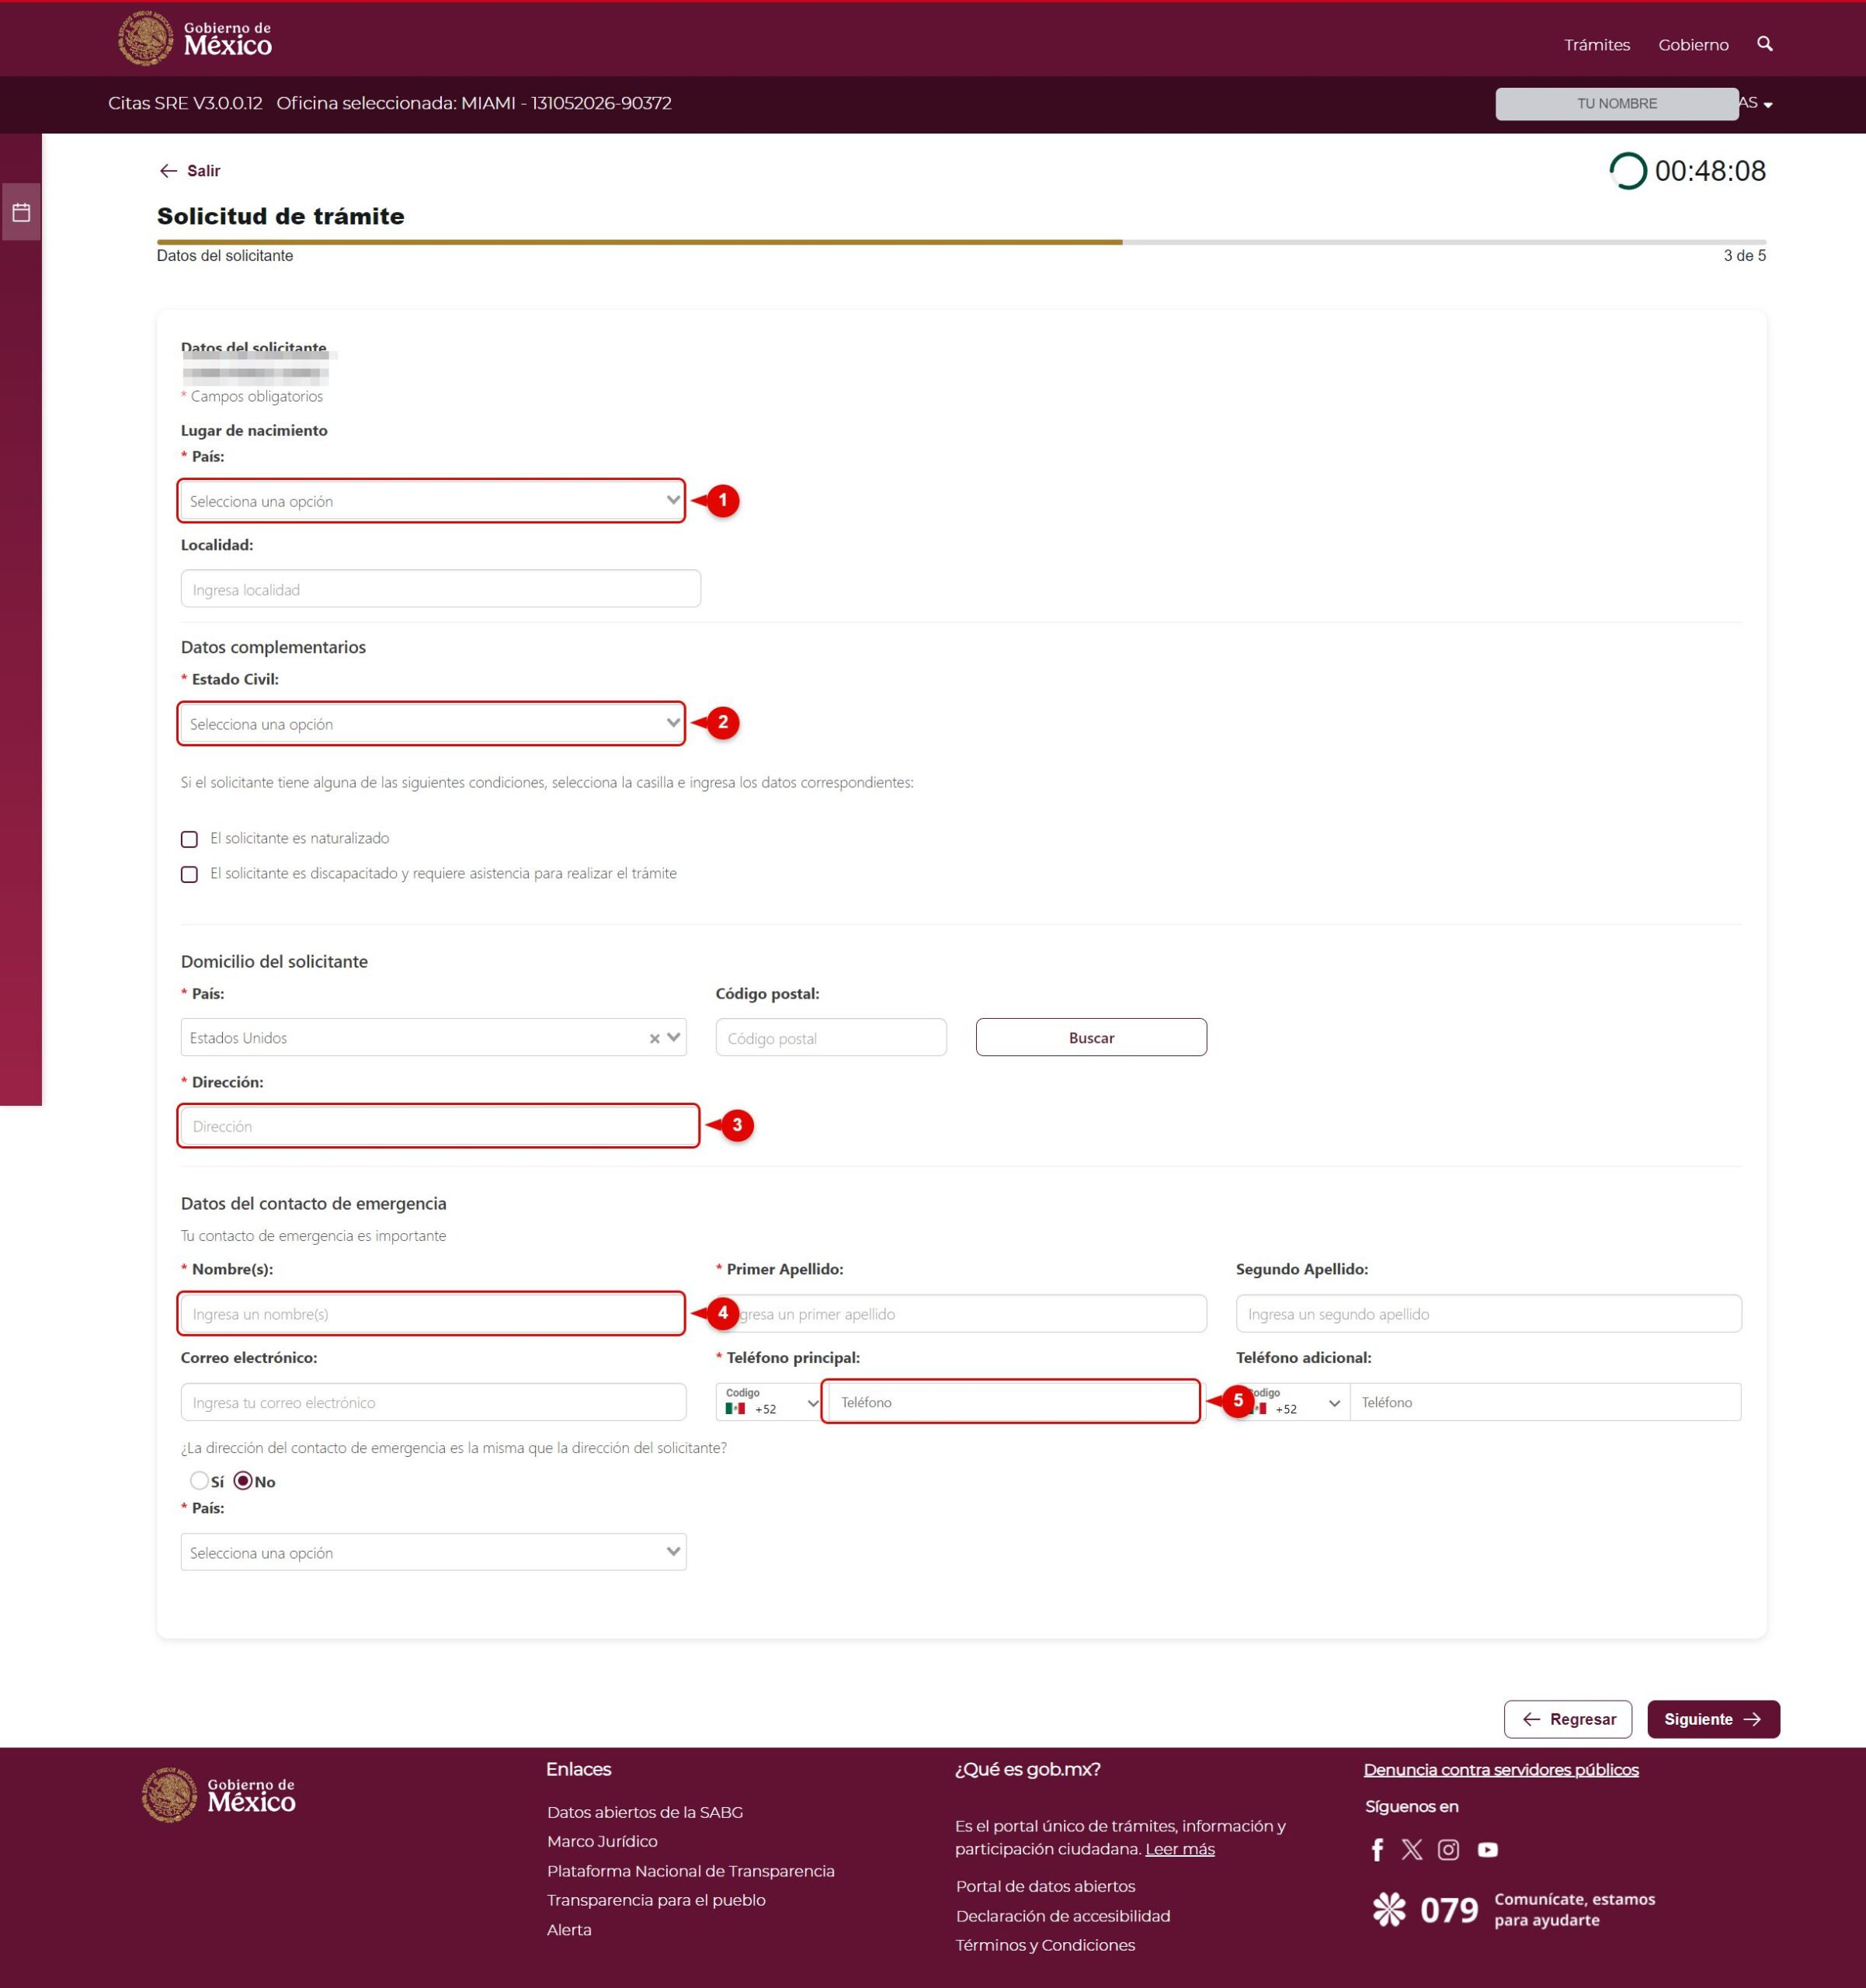
7. Step 3: Complete the applicant’s information
In Step 3 of 5 (Applicant information), fill in the Place of birth (number 1) and Marital status (number 2).
Then complete the Applicant’s address with country, ZIP code, and address (number 3).
Lastly, enter the Emergency contact information: first and last name (number 4) and main phone number (number 5). When you’re done, click “Next.”
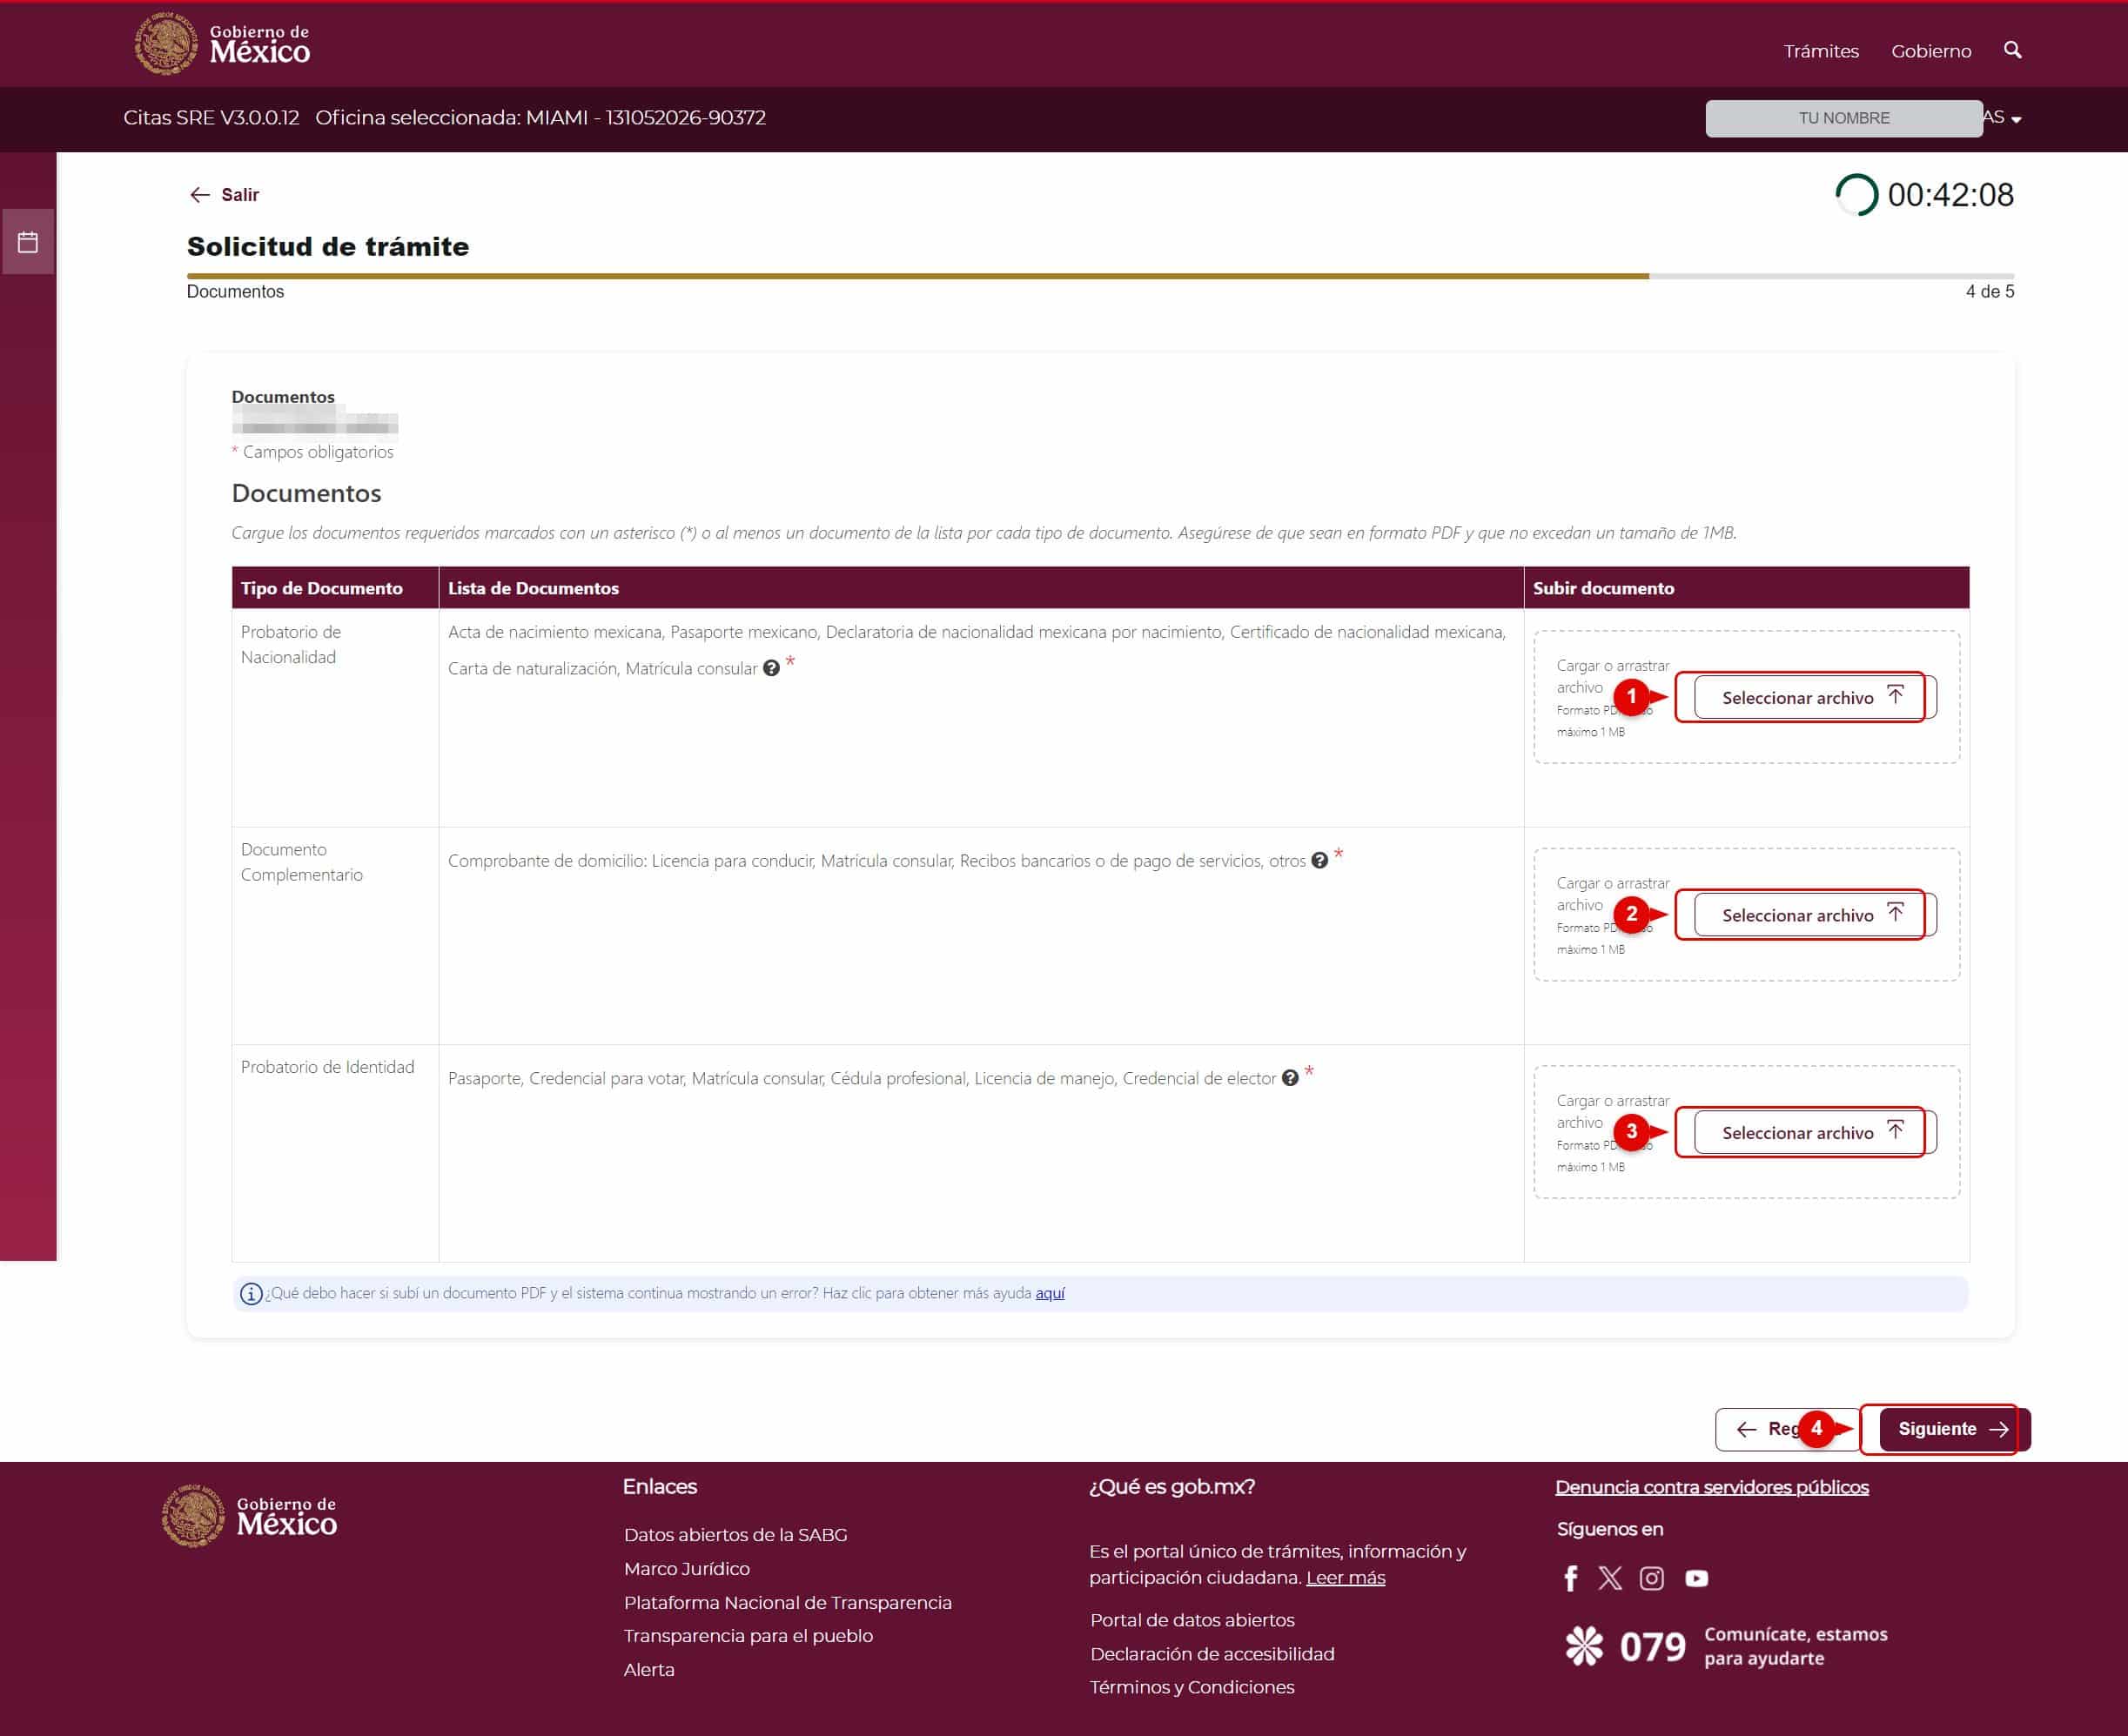
8. Step 4: Upload the documents
In Step 4 of 5 (Documents), you must upload one document for each required type: Proof of nationality (number 1), Supporting document (number 2), and Proof of identity (number 3).
Use the “Select file” button on each row. Files must be in PDF format and no larger than 1 MB.
Once you have uploaded all three documents, click “Next” (number 4).
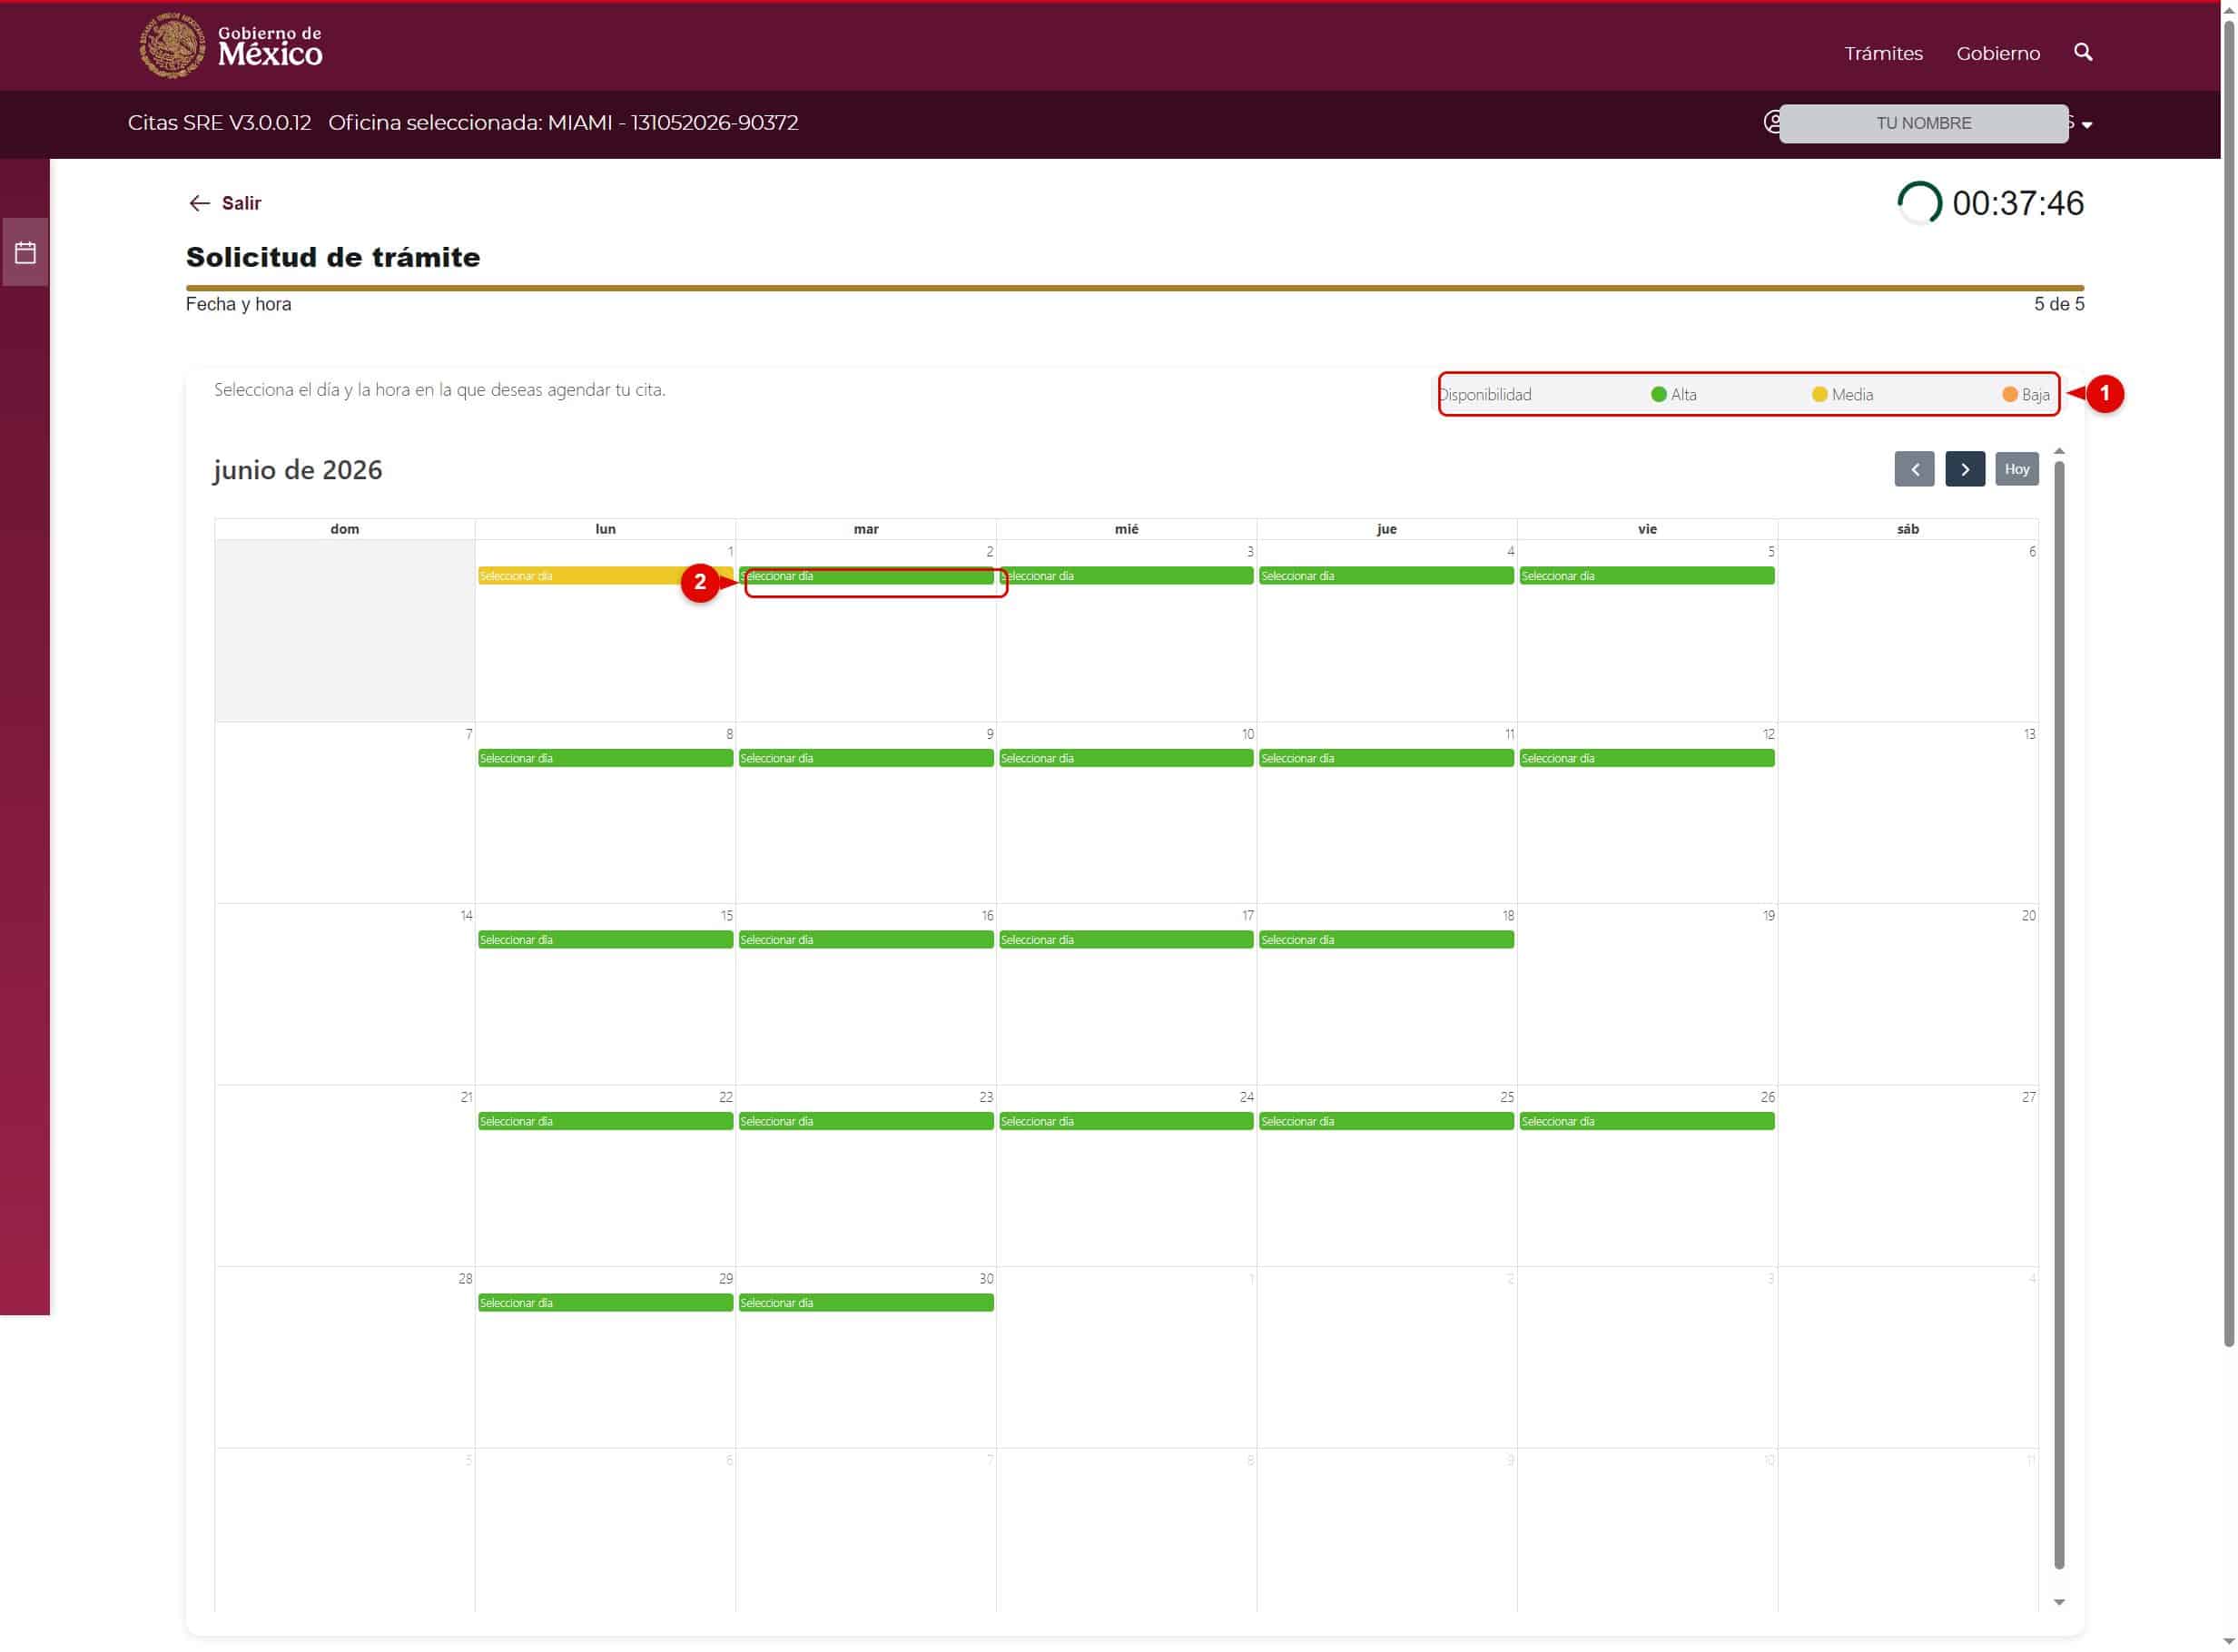
9. Step 5: Choose the appointment day
In Step 5 of 5 (Date and time), you’ll see a calendar showing availability for each day.
The colors indicate how open the date is: green = high, yellow = medium, orange = low (number 1).
Click “Select day” on the date you prefer (number 2).
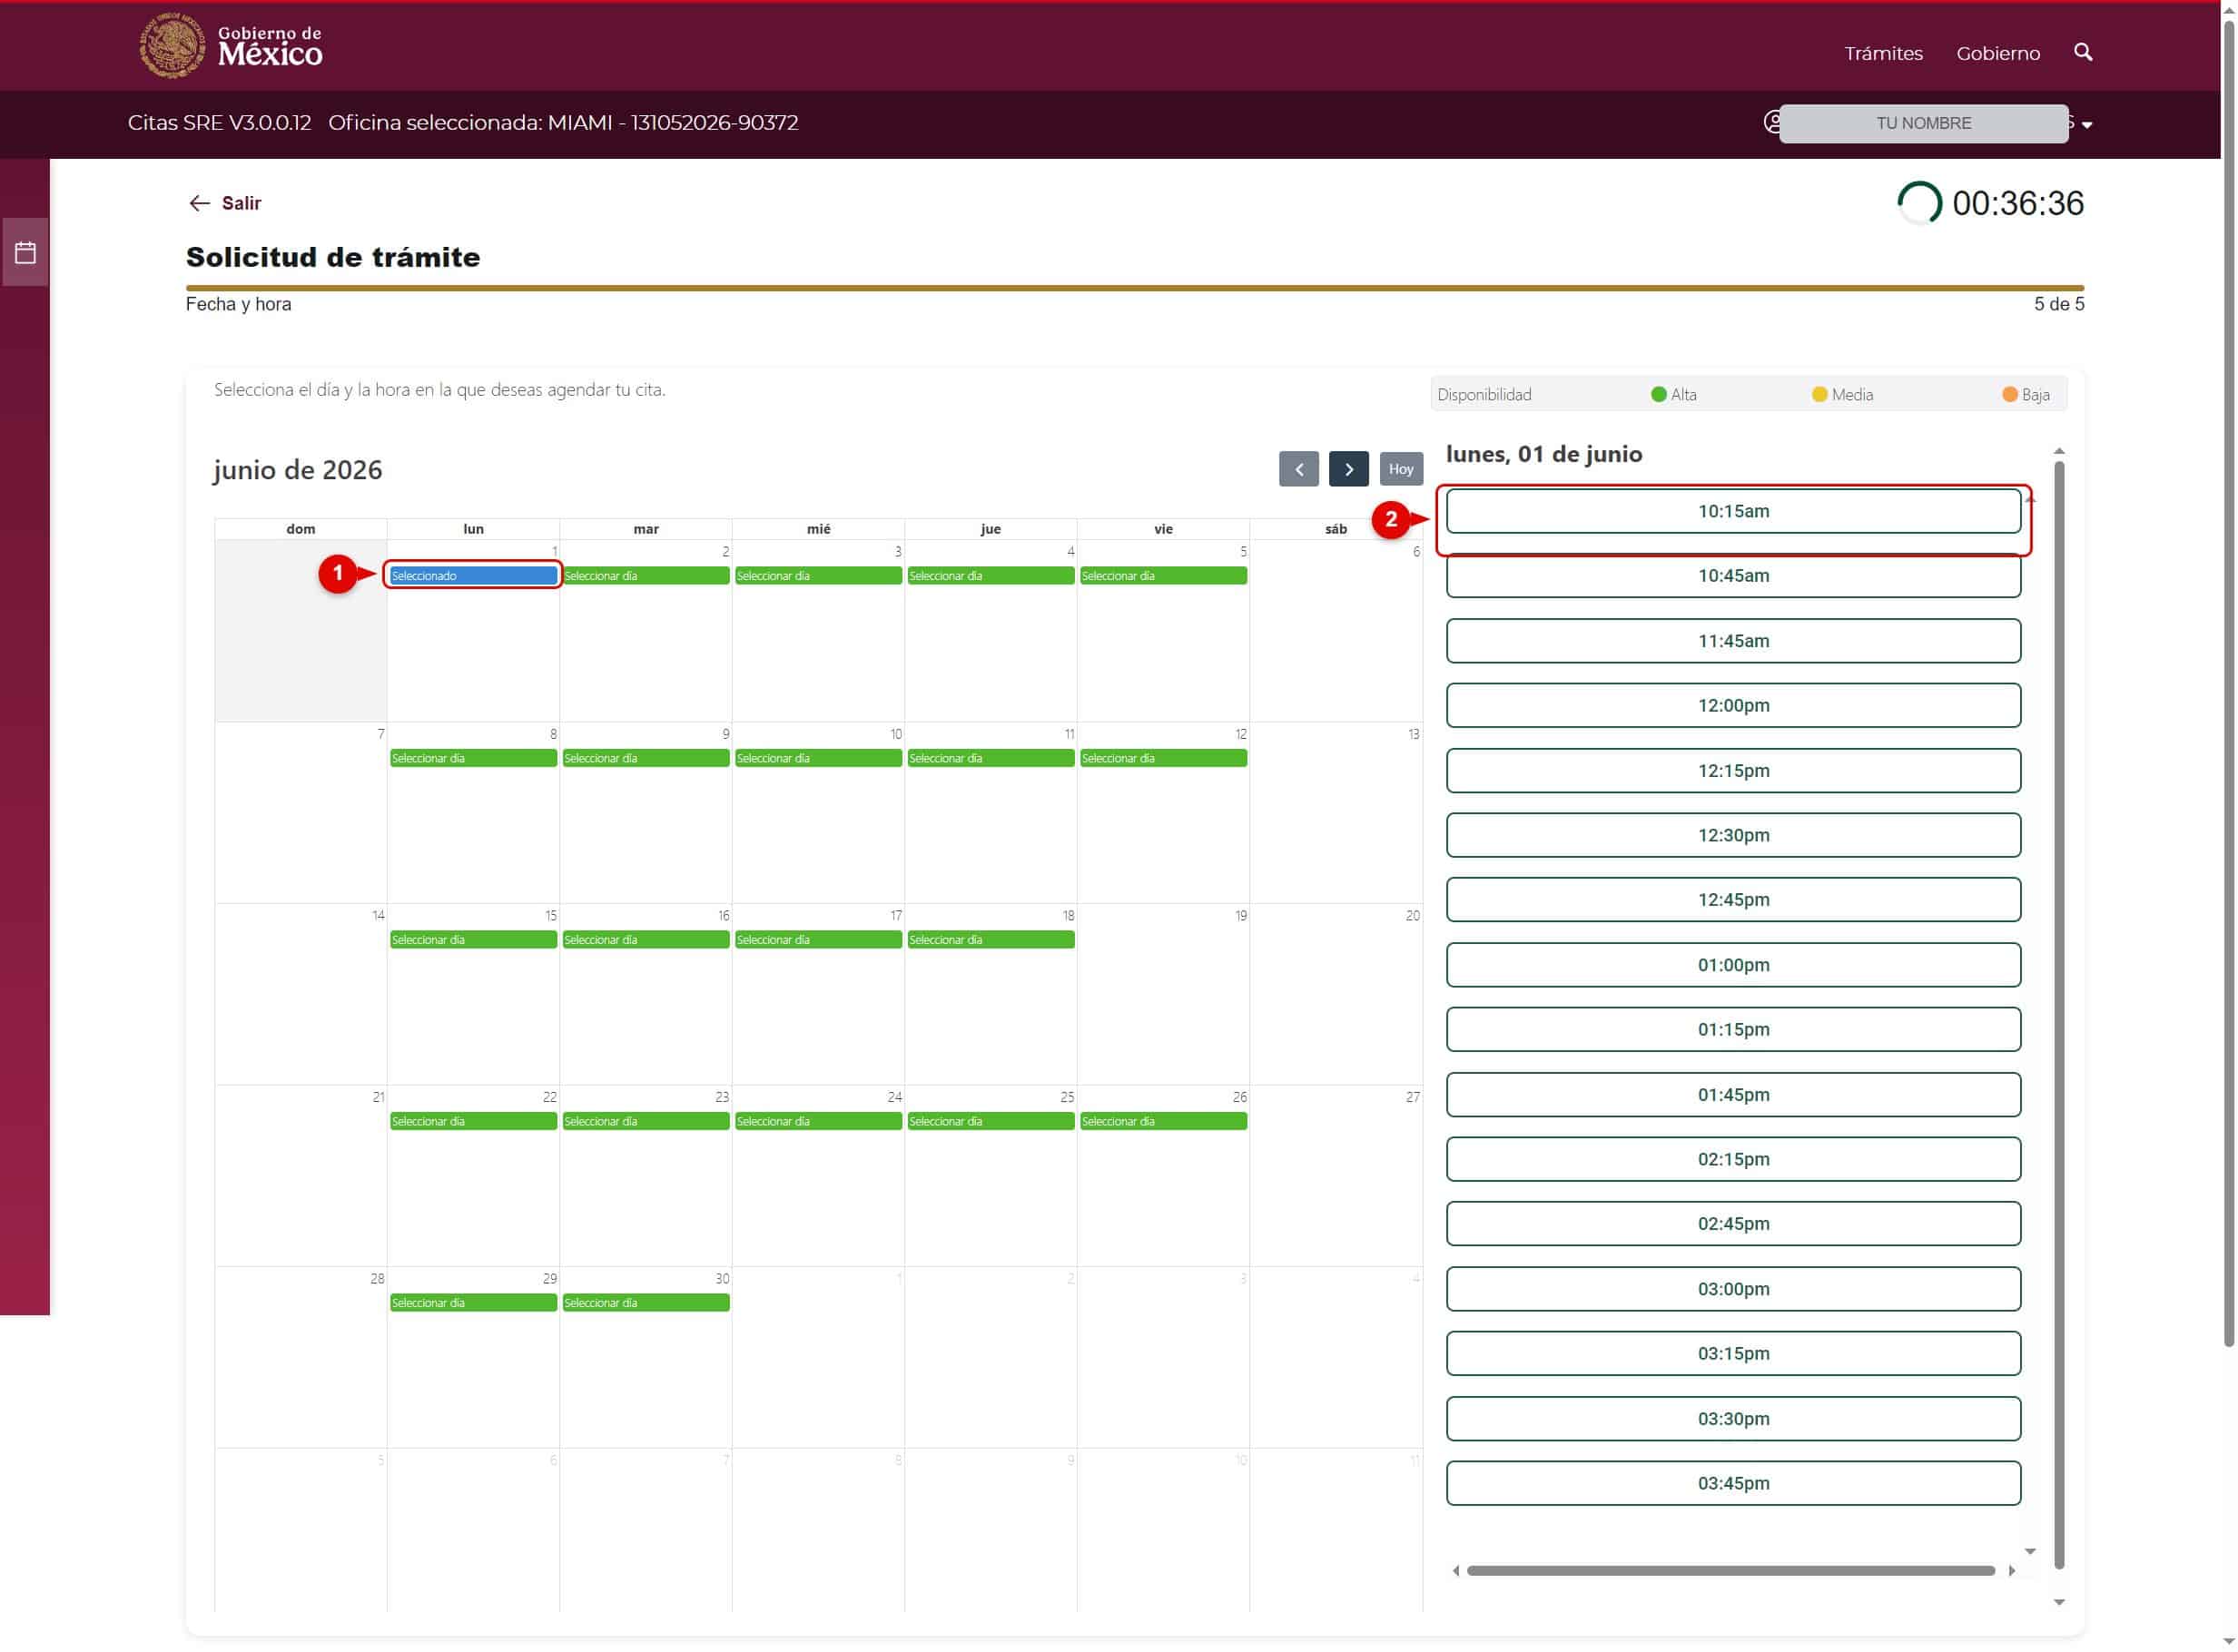
10. Choose a time and confirm
After selecting the day (number 1), the available time slots will appear on the right.
Choose the time that works best for you (number 2) and confirm the appointment to finish.
You’ll receive your appointment confirmation at the email address you registered.
And that’s it: your consular appointment is scheduled in the new Citas SRE system.